
[et_pb_section fb_built=”1″ admin_label=”section” _builder_version=”4.16″ global_colors_info=”{}”][et_pb_row admin_label=”row” _builder_version=”4.16″ background_size=”initial” background_position=”top_left” background_repeat=”repeat” global_colors_info=”{}”][et_pb_column type=”4_4″ _builder_version=”4.16″ custom_padding=”|||” global_colors_info=”{}” custom_padding__hover=”|||”][et_pb_code _builder_version=”4.27.6″ _module_preset=”default” hover_enabled=”0″ sticky_enabled=”0″]
A leaking roof rarely gets better on its own. This guide walks through why San Antonio metal roofs develop leaks, how to find the source before you call anyone, what a fair repair actually costs, and how to tell the difference between a quick fix and a sign that something bigger is going on.
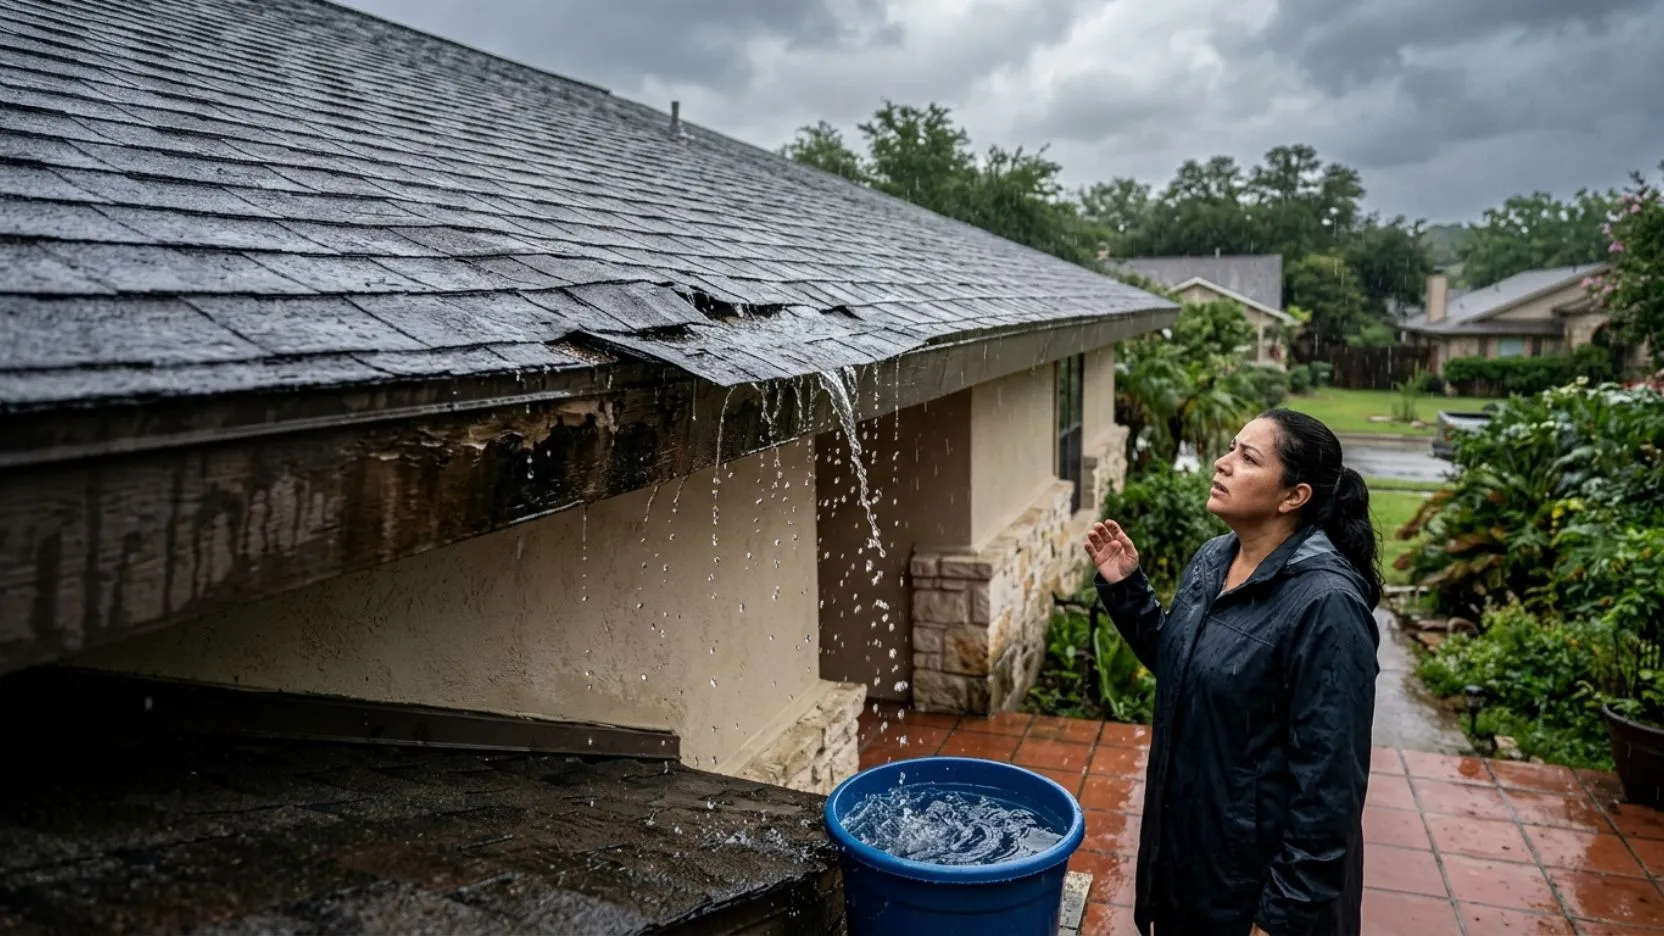
A leaking roof almost always feels like an emergency the moment it shows up, and in a lot of cases it is. But the most expensive mistake a San Antonio homeowner can make is patching the spot where water is dripping inside the house without ever finding out where it actually entered the roof. Water on a metal roof can travel several feet along a panel seam or rafter before it drops, so the wet ceiling tile and the real leak source are often nowhere near each other.
This guide covers the most common causes of roof leaks we see across San Antonio and Bexar County, how a proper leak diagnosis is supposed to work, what repairs typically cost in 2026, and the warning signs that tell you a leak has gone from a simple fix to something more serious.
A contractor who quotes a leak repair without getting on the roof is guessing. The ceiling stain tells you where water showed up, not where it got in. A proper inspection traces the path back to the actual failure point, whether that is a fastener, a flashing gap, or a cracked seam, and that is what determines whether the repair lasts through the next rainstorm.
Leak Repair
Most metal roofs in San Antonio are held down with exposed fasteners, and every one of those screws is a potential entry point for water. Over years of Texas heat and cold, the rubber washer under each screw hardens and cracks, and the screw itself can back out slightly as the metal panel expands and contracts. Sealant around flashings, vents, and panel overlaps breaks down the same way under constant sun exposure.
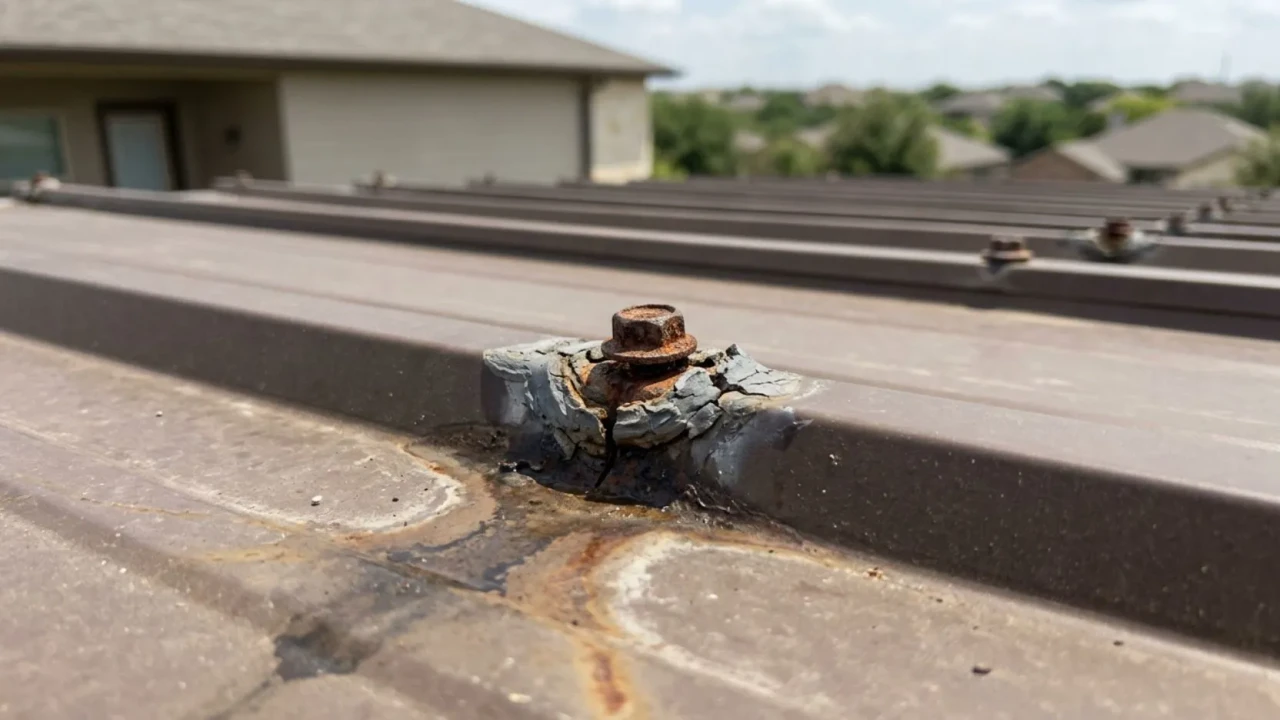
Backed-out screws: Thermal cycling works fasteners loose over time, especially on roofs that have never had a maintenance inspection.
Cracked sealant: Caulk at ridge caps, panel laps, and penetrations has a service life of roughly five to ten years in San Antonio’s climate before it needs renewal.
- Contractor physically walks the roof before quoting, not just the attic or ceiling
- All fasteners in the affected area checked for backing out and washer condition
- Flashings inspected at every chimney, vent, and skylight penetration
- Sealant assessed at ridge caps and panel overlaps, not just the obvious spot
- Hose test or water test used to confirm the leak source before repair begins
- Repair includes a written workmanship warranty, separate from the materials warranty
Storm Damage
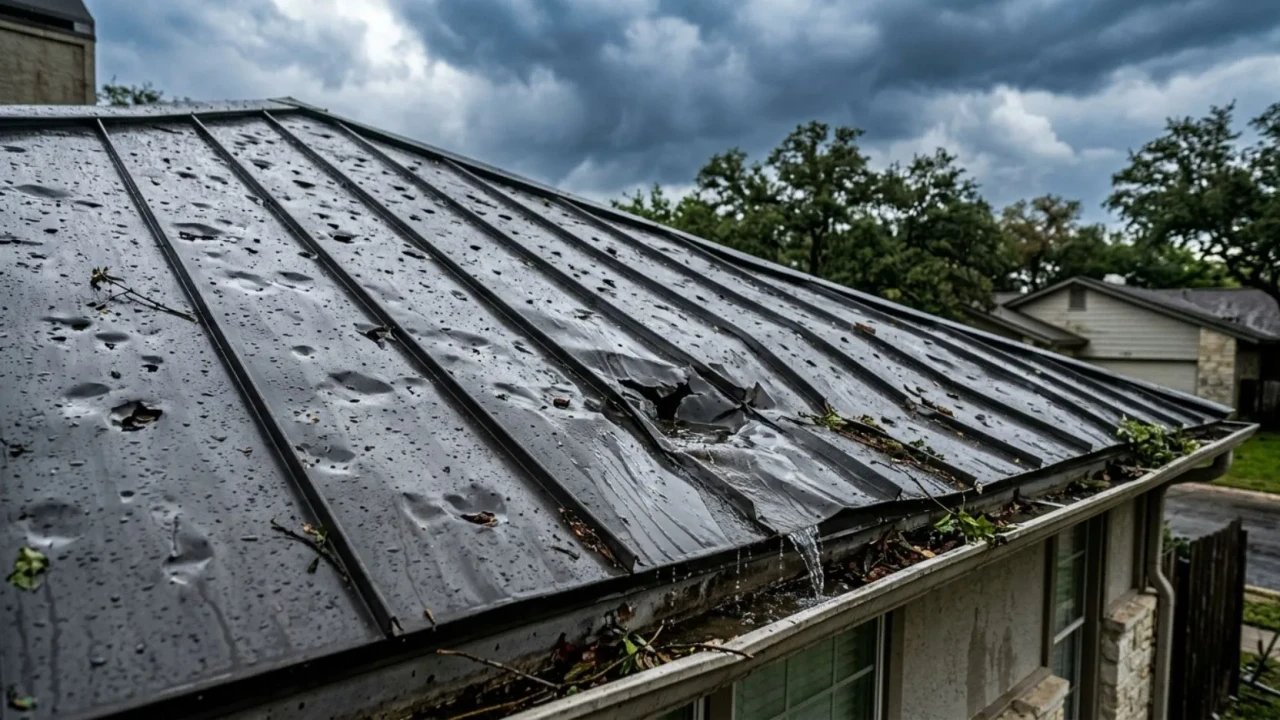
San Antonio sits in one of the most active hail corridors in the country, and a hailstorm is the fastest way for a roof that was previously watertight to start leaking overnight. Metal roofs hold up better than asphalt shingles in hail, but they are not invulnerable. Large hail can dent panels, crack the protective coating on stone-coated steel, lift ridge caps, and crease seams enough to break the watertight seal.
File a storm damage claim within the window your policy allows, typically one year in Texas. After a major hail event, adjusters get backlogged fast. Do not wait on the adjuster before calling a roofer. A reputable contractor will document the damage with photos and give you an independent estimate alongside whatever the insurance company comes back with.
- Roof inspected within 30 days of the storm event, regardless of visible damage
- Damage documented with dated photos before any temporary repairs are made
- Insurance claim filed promptly if hail size was one inch or larger
- Emergency tarp applied immediately if water is actively entering the building
- Contractor confirms matching panel profile and color before ordering replacement material
Rust and Corrosion
Rust does not announce itself the way a storm does. It builds quietly in spots where the protective coating has worn through, where debris sits trapped against the panel, or where two different metals are touching and triggering galvanic corrosion. Surface rust caught early is a simple maintenance fix. Rust that has eaten all the way through the panel is a leak source that will not stop until the panel itself is replaced.
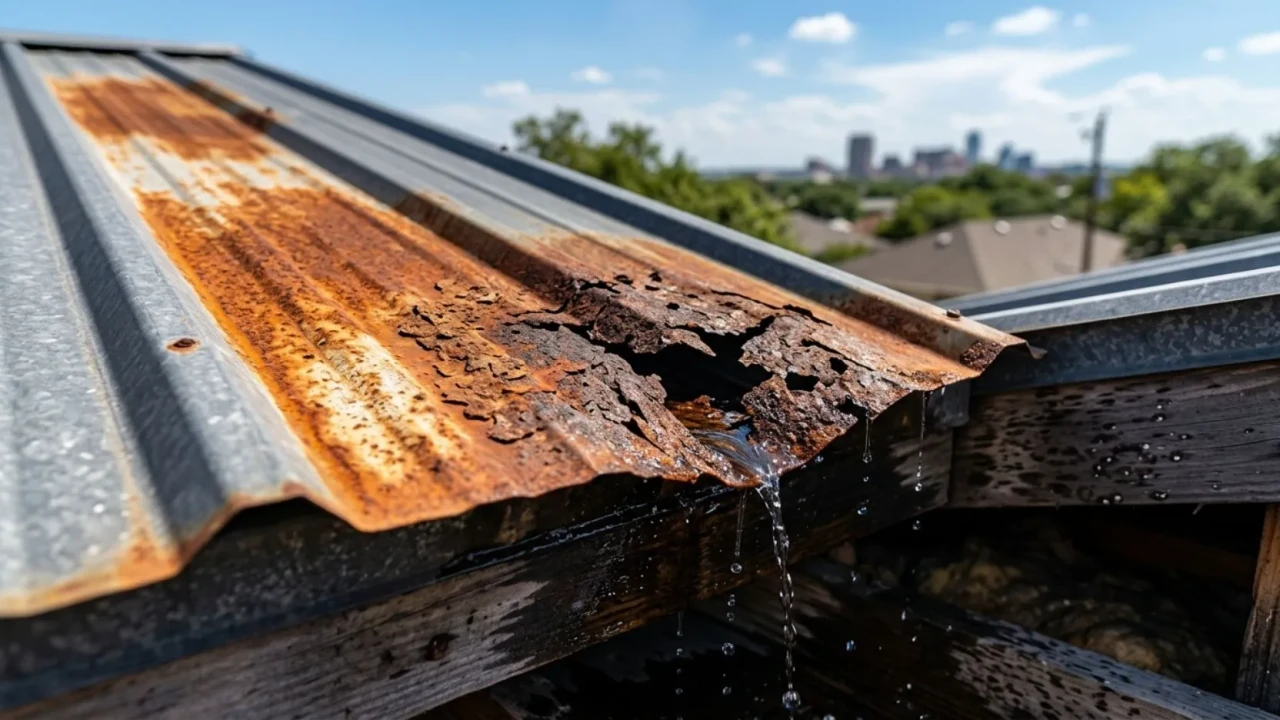
Surface rust: Light discoloration where the coating has broken down. Treatable with a rust converter and fresh coating, no leak risk yet.
Pitting rust: Rust has worked into the metal but has not gone all the way through. Needs a rust inhibitor and likely a protective coating soon.
Through-panel corrosion: Rust has eaten a hole through the panel. This is an active or imminent leak source and the panel needs replacing.
- Rust stage assessed before any repair is quoted: surface, pitting, or through-panel
- Debris cleared from valleys and gutters where moisture tends to collect
- Dissimilar metals identified, such as copper flashing resting against a steel panel
- Attic checked for pinhole light coming through panels if through-panel corrosion is suspected
- Treated areas primed and recoated with a product rated for metal roofing
Flashing
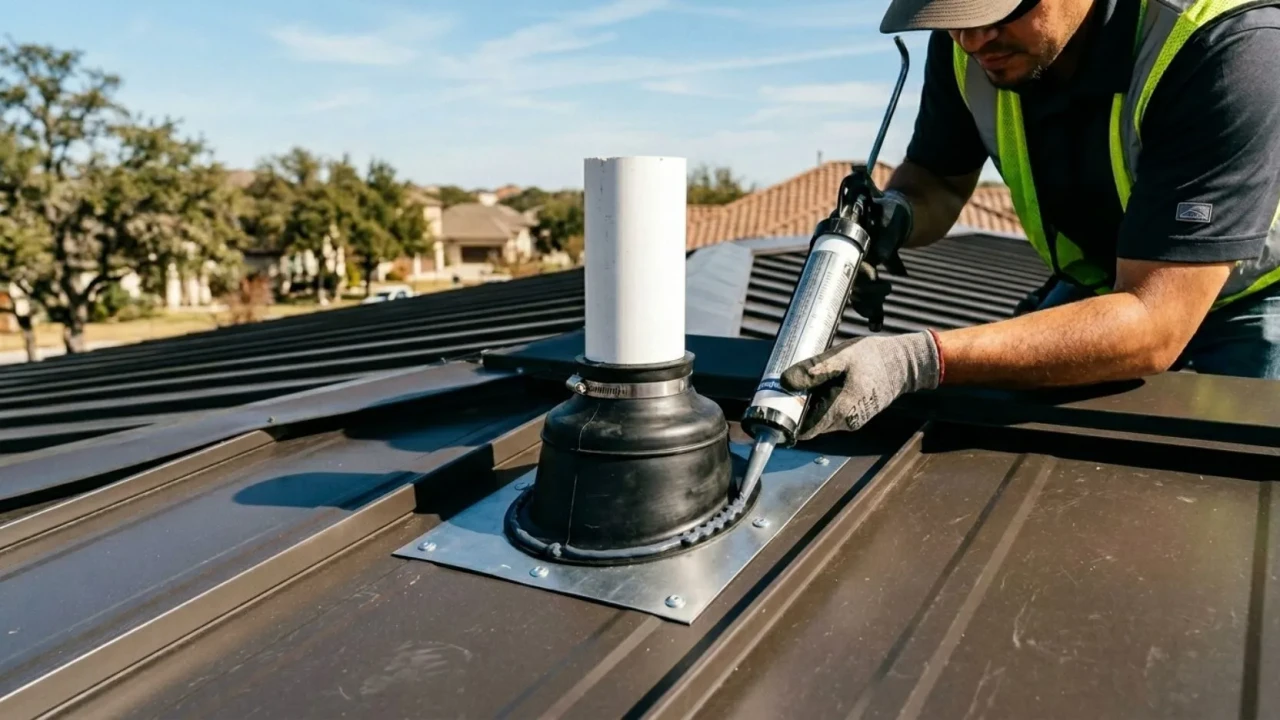
Every place something passes through a metal roof, a vent pipe, a chimney, an HVAC curb, a skylight, is a manufactured seam that depends entirely on flashing and sealant to stay watertight. If the original installer did not lap the flashing correctly or used the wrong sealant for the panel material, that penetration can leak from the day it was installed, or it can hold for years before the flashing finally corrodes through.
- Every penetration on the roof inspected, not just the one near the visible ceiling stain
- Pipe boots checked for cracking, shrinkage, or UV degradation
- Flashing layering confirmed correct: step flashing under counter flashing, never reversed
- Sealant type confirmed compatible with the specific panel material being sealed
Diagnosis
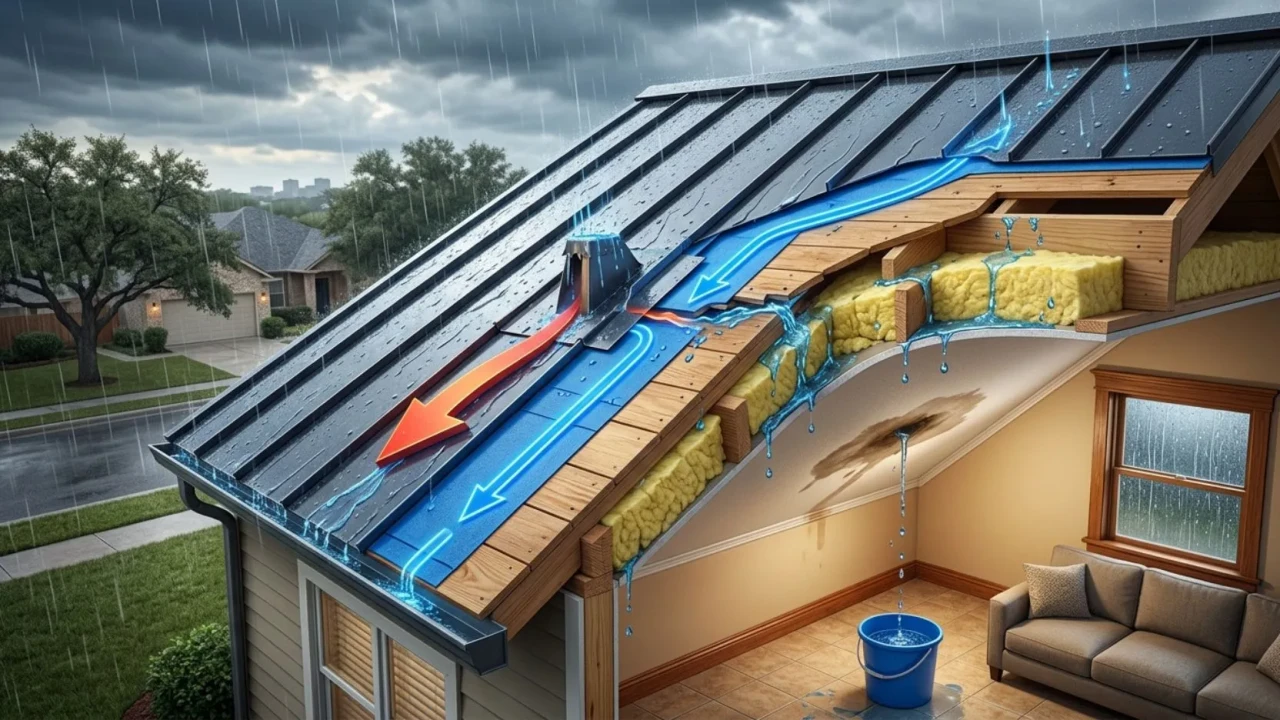
This is the part that trips up most homeowners and more than a few inexperienced contractors. Water entering a metal roof does not fall straight down through the decking the instant it gets past the panel. It runs along the underside of the panel, follows a rafter or purlin, soaks into insulation, and finds the lowest point before it finally drips into the living space below. That drip point can be five or ten feet from the actual entry point on the roof surface.
| Where you see the stain | Likely actual source | Why it travels there |
|---|---|---|
| Ceiling near an exterior wall | Flashing at the roof to wall transition | Water runs down the wall sheathing before dropping at the ceiling line |
| Center of a room, no nearby penetration | Fastener failure several feet upslope | Water follows the panel rib or rafter to the nearest low point |
| Around a light fixture | Often unrelated to the fixture itself | Electrical boxes sit at common low points where insulation directs water |
| Near a chimney or skylight | Usually the flashing at that exact penetration | Short travel distance makes this one of the more reliable matches |
These price ranges reflect real San Antonio market rates in 2026. Costs vary based on roof pitch, access difficulty, panel type, and how much of the roof is affected. Get every estimate confirmed in writing before work begins.
| Leak source | Typical cost range | Common cause | Urgency |
|---|---|---|---|
| Single-point fastener or sealant | $150 to $350 | Backed-out screw, cracked caulk | High, address within 30 days |
| Flashing repair | $300 to $700 | Corrosion or improper original install | High, active leak source |
| Pipe boot replacement | $120 to $300 | UV-cracked rubber collar | Medium, schedule promptly |
| Storm or hail panel repair | $400 to $900 | Impact damage, broken coating | High if coating is broken |
| Rust treatment and recoating | $200 to $500 | Coating failure, trapped moisture | Medium, treat before next wet season |
| Through-panel rust replacement | $800 to $2,000+ | Long-term untreated corrosion | High |
| Emergency tarp installation | $200 to $600 | Active interior water intrusion | Immediate |
- Move furniture and valuables away from the dripping area immediately
- Place a bucket or container to catch water and protect flooring
- Take photos of the stain or drip location and note the date and weather conditions
- Call a roofer the same day if water is actively entering the building
- Contractor has physically inspected the roof, not just the attic or ceiling stains
- Written repair quote received with the specific scope, not just a dollar figure
- Hose test or water test performed to confirm the actual leak source
- Certificate of insurance received and verified, at least one million dollars in liability coverage
- Completed repair inspected and signed off before final payment is made
- Warranty document received with contractor contact information and coverage period
- Next inspection date noted: roofs in San Antonio should be checked every two to three years
- Insurance documentation kept on file if a storm damage claim was involved
How much does it cost to fix a leaking roof in San Antonio?
Why does my roof leak only when it rains hard?
Can I patch a roof leak myself before calling a contractor?
Why does my roof keep leaking after it was already repaired?
Does homeowners insurance cover a leaking roof in San Antonio?
How long does it take to fix a leaking roof?
Get a free leaking roof inspection in San Antonio
Tell us about your leak, the stain, the drip, or anything you are not sure about. We will inspect it for free, trace the actual source, and give you a clear written repair estimate at no cost.
[/et_pb_code][/et_pb_column][/et_pb_row][/et_pb_section]