Most homeowners will never install a roof themselves, but knowing how the process works helps you feel confident during the project. “I didn’t want to tell the crew how to do their job,” one homeowner said, “I just wanted to know if things were going the right way.”
This step-by-step guide on how roofs are installed explains what happens from the first inspection to the final cleanup. It’s written in plain language so you know what to expect and what good work looks like.
Step 1: Roof Inspection and Preparation
Every roof installation starts with a full inspection. Contractors measure the roof, check the structure, and plan material needs. Homeowners are usually asked to clear the driveway and remove fragile items inside the home.
“Once they measured everything, the timeline made more sense,” a homeowner explained.
Professional preparation steps are outlined in the Angi roof installation steps guide, which explains why planning reduces delays and mistakes.
Step 2: Removing the Old Roof
Next comes the tear-off. Crews remove old shingles or panels and dispose of them safely. This is the noisiest part of the job.
“It sounded intense for a few hours, but then it calmed down,” one homeowner shared. Tarps and protective coverings are used to manage debris.
Real installation experiences discussed in Reddit roofing installation discussions show that tear-off usually takes only part of the day on standard homes.
Step 3: Installing Underlayment and Flashing
Once the roof deck is exposed, contractors install underlayment. This layer adds protection against moisture. Flashing is placed around chimneys, vents, and roof edges.
“A roof can look great and still leak if this part is rushed,” a contractor noted.
The role of underlayment and flashing in the roofing system is explained clearly in the Wikipedia roofing system overview.
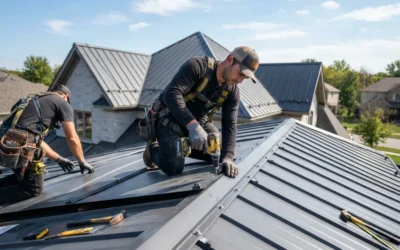
Step 4: Installing Shingles or Roofing Material
After preparation, the main roofing material is installed. Shingles are laid in rows, while metal or tile follows specific placement patterns.
Most residential roofs reach this stage quickly. “Once the shingles started going on, the house looked finished fast,” a homeowner said.
Timeline estimates shared in the HomeAdvisor roof installation process show that many homes are completed within one to three days.
Step 5: Final Inspection and Cleanup
The final step includes cleanup and inspection. Crews remove debris, run magnets to pick up nails, and inspect the roof for issues.
Homeowners often wonder what to check at the end. Common questions about final inspections appear in Quora roof installation questions.
You should receive warranty details and care instructions before the crew leaves.
Conclusion
This step-by-step look at how roofs are installed shows that roofing is a structured process, not guesswork. Each step builds on the last to protect your home.
When you understand the process, it’s easier to spot good workmanship and communicate confidently with your contractor.