
[et_pb_section fb_built=”1″ admin_label=”section” _builder_version=”4.16″ global_colors_info=”{}”][et_pb_row admin_label=”row” _builder_version=”4.16″ background_size=”initial” background_position=”top_left” background_repeat=”repeat” global_colors_info=”{}”][et_pb_column type=”4_4″ _builder_version=”4.16″ custom_padding=”|||” global_colors_info=”{}” custom_padding__hover=”|||”][et_pb_code _builder_version=”4.27.7″ _module_preset=”default” hover_enabled=”0″ sticky_enabled=”0″]
A leaking roof in San Antonio rarely announces itself with a dramatic waterfall through the ceiling. Most leaks start small, stay hidden for months, and cause serious structural damage long before a homeowner notices anything from the inside. This guide covers every warning sign of a roof leak, where to look for them, and exactly what steps to take when you find one.
San Antonio’s weather is hard on roofs. Intense summer heat, rapid temperature swings between seasons, hailstorms that roll through Bexar County every spring, and the occasional heavy rainfall event that drops several inches in a few hours all combine to create conditions where even a well-installed roof develops vulnerabilities over time. The challenge for homeowners is that those vulnerabilities rarely show up where you expect them, and they rarely announce themselves before real damage has already begun.
The most expensive roof leaks are never the obvious ones. The slow seep around a flashing joint, the tiny gap at a ridge cap, the fastener whose rubber washer cracked two years ago but has not quite started dripping yet these are the leaks that silently saturate insulation, rot decking, grow mold in wall cavities, and eventually compromise structural framing before a single water stain appears on a ceiling. Knowing what to look for, where to look for it, and what to do the moment you find it is what separates a $400 repair from a $12,000 structural remediation project.
Water does not travel in a straight line once it gets through your roof. A leak that appears as a stain on your living room ceiling may have entered the roof 10 or even 15 feet away. Water follows the path of least resistance along rafters, decking, insulation batts, and vapor barriers before it finally drops to a surface you can see. This is the single most common reason DIY leak repairs fail: homeowners patch the point where they see the water coming through, rather than the actual entry point on the roof. A proper diagnosis always starts on the roof surface itself, not from inside the home.
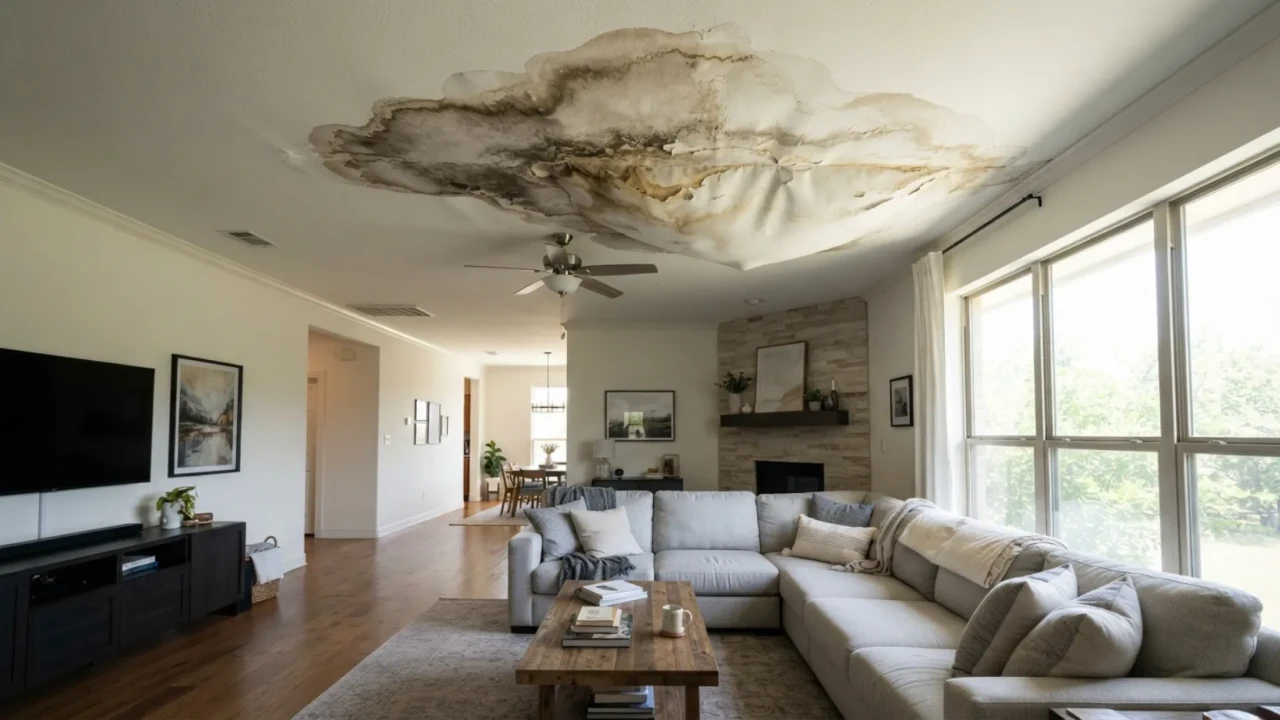
Interior signs of a roof leak are often the first ones homeowners notice, but they are typically late-stage indicators. By the time water is visible inside your home, the leak has usually been active for weeks or months. Here is what to look for and what each sign tells you about the source and severity of the problem.
Interior Sign
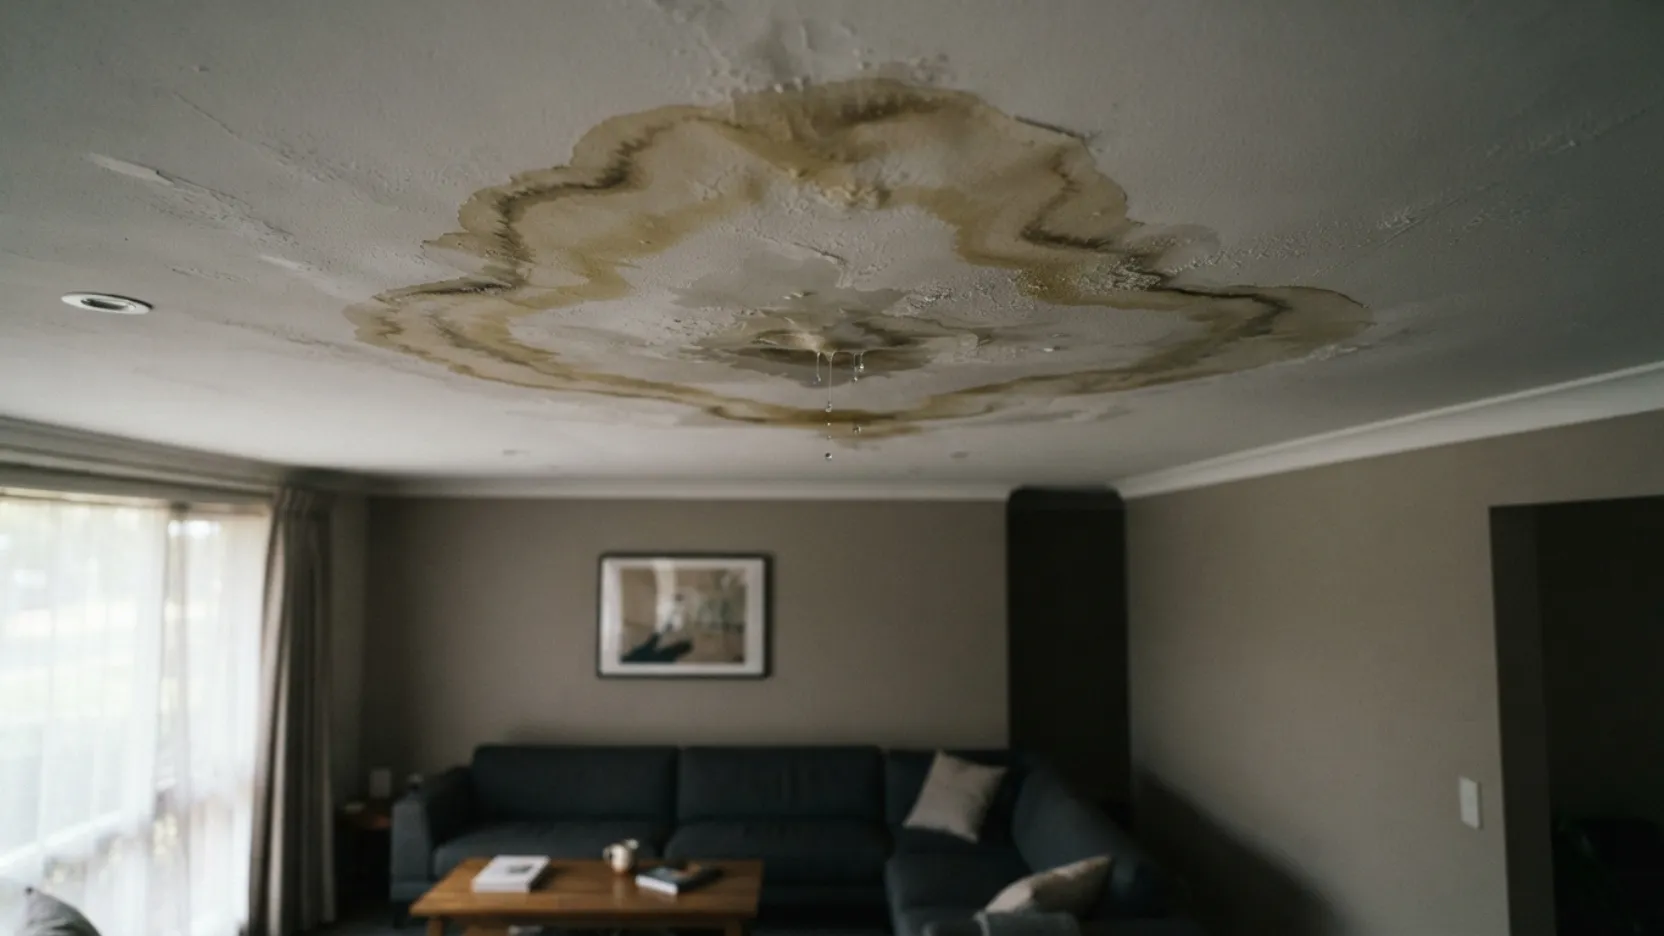
A brown or yellowish ring on a ceiling is the visual most people associate with a roof leak, and for good reason. When water soaks through insulation and drywall, it leaves mineral deposits behind as it evaporates, creating the characteristic stained outline that indicates repeated wetting and drying cycles. What many homeowners do not realize is that a stain of this kind means the leak has been active long enough to saturate the insulation layer above the drywall this is not a new problem.
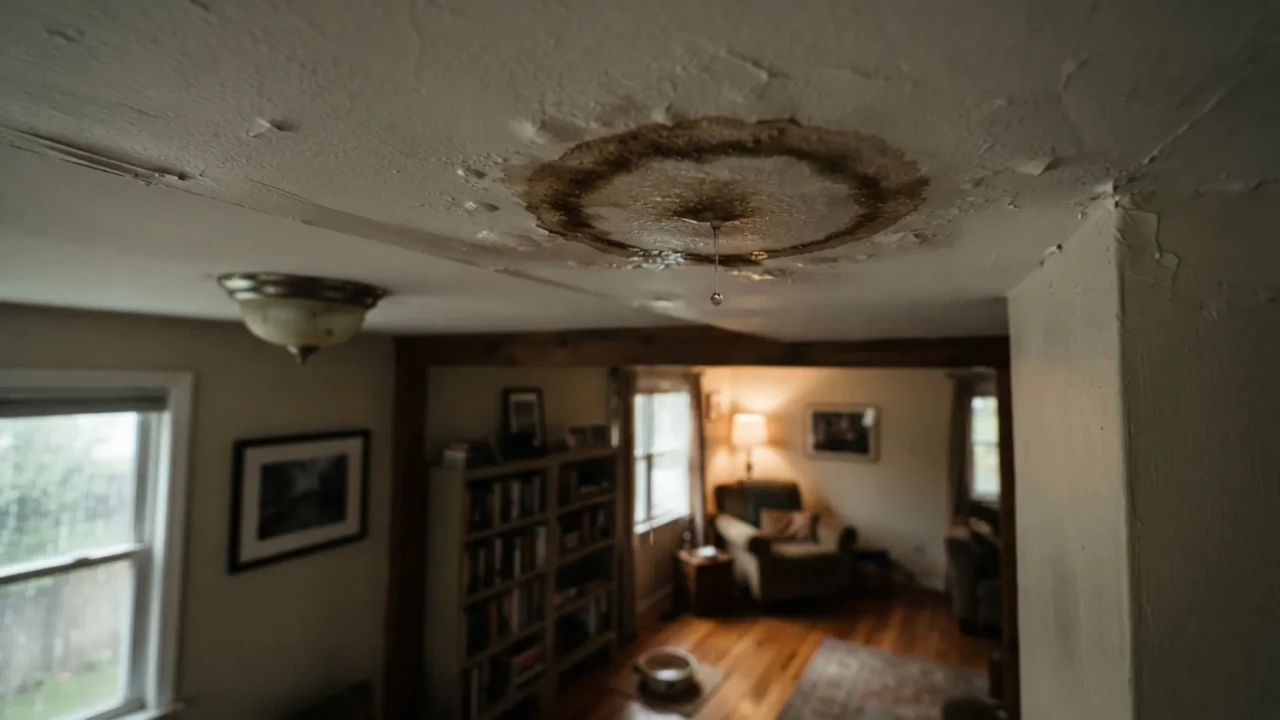
What the stain shape tells you: A round, well-defined ring usually indicates a slow, persistent leak that has been active over many cycles. An irregular, spreading stain often points to a larger active leak or one that is accelerating. Multiple stains in a pattern that tracks the roof framing suggest water is traveling along a rafter or truss before dropping.
Wall stains and streaking: Staining that runs down an interior wall, especially near a chimney, skylight, or exterior wall, points to flashing failure or a compromised wall-to-roof junction. These areas are among the most common leak sources on San Antonio homes because caulk and flashing sealants break down under the region’s UV exposure and temperature cycling.
- Photograph the stain and note the date this documents the timeline for any insurance claim
- Do not assume the leak source is directly above the stain a professional inspection is required
- Check whether the stain grew between your last observation and today a growing stain means an active leak
- Feel the drywall around the stain: soft or spongy material means the moisture has fully saturated that section
- Look for a corresponding stain or wet spot on the attic floor insulation directly above the ceiling stain
- Call a roofing contractor for an inspection within 30 days do not wait for the next rain to confirm it
Urgent
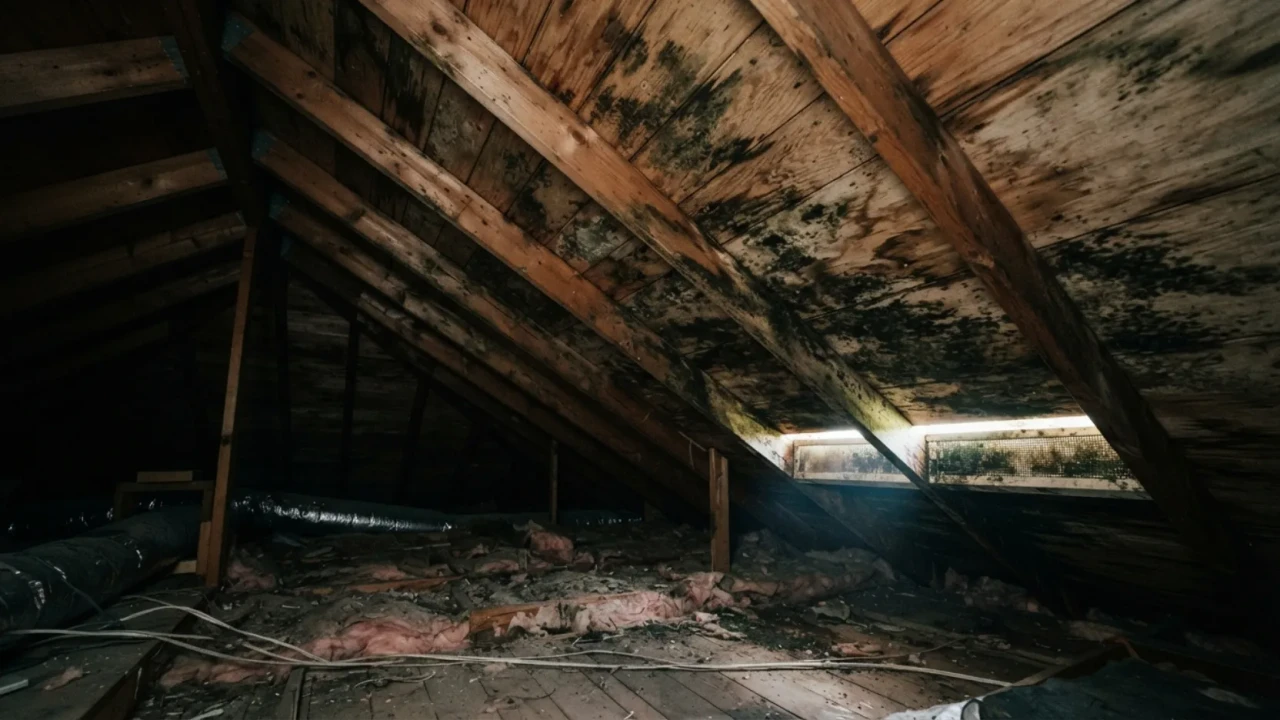
Mold does not begin growing the moment a leak starts. It requires a sustained moisture presence, typically several days of elevated humidity or repeated wetting events, before colonies establish. When you find mold in an attic, on roof decking, or along the rafters, you are looking at evidence of a leak that has been active long enough to create ongoing biological activity. In San Antonio’s warm climate, mold growth can begin within 24 to 48 hours of a moisture event and spreads rapidly once established.
A musty odor in a bedroom, hallway, or upper-floor room without any visible staining is one of the most commonly overlooked early indicators of a slow attic leak. The odor comes from mold growing on wood framing or insulation in the attic cavity above, filtering down through light fixtures, ventilation gaps, and ceiling penetrations before any visible water staining has occurred on the drywall surface.
Mold in an attic is not a cosmetic issue. Certain mold species common in moisture-damaged attics, including Stachybotrys (black mold), produce mycotoxins that can cause respiratory symptoms, headaches, and long-term health effects with prolonged exposure. If you find active mold growth on roof decking or framing during an attic inspection, do not disturb it, limit access to the space, and contact both a licensed roofing contractor to address the moisture source and a licensed mold remediation company to assess the extent of the biological damage before any repair work begins.
- Do not disturb mold growth do not sweep, vacuum, or attempt to bleach active colonies before assessment
- Photograph and document the extent of visible mold growth with dates
- Schedule a roofing inspection to identify and close the moisture source before any remediation begins
- Contact a licensed mold remediation company for an independent assessment of affected materials
- Check your homeowner’s insurance policy: mold remediation is sometimes covered when caused by a sudden covered event
- Do not run HVAC through the affected attic space until the mold source is addressed this spreads spores
Emergency
A ceiling that is visibly bowing downward, feels soft when pressed, or shows a bubble-like bulge is not a repair situation it is an emergency. What you are looking at is drywall that has absorbed enough water to lose its structural integrity and is being pushed down by the weight of water pooled in the insulation layer or in a low point in the roof membrane above. If the drywall gives way, the water pooled above it will release all at once, causing immediate water damage to everything in the room below.
The right immediate action when you find a sagging ceiling section is to relieve the water pressure before it fails on its own terms. Use a screwdriver to poke a small hole at the lowest point of the bulge and let the water drain in a controlled way into buckets. This prevents the ceiling from collapsing in a sheet and limits the secondary damage from an uncontrolled release. This is not a repair it is damage control. A roofing contractor needs to be called immediately regardless of time of day or weather conditions.
If the ceiling is sagging or bubbling during active rain, do not walk under it. Clear the room and all furniture from beneath the affected area. A saturated section of drywall can weigh significantly more than its dry weight and can fall without further warning. Contain the area, poke a controlled drainage hole from the side using a ladder to avoid being directly underneath, and call for emergency roofing service immediately. Protecting your belongings and yourself comes before any temporary patching attempt.
- Clear the area below the sagging section immediately people and furniture out of the fall zone
- Photograph the bulge before draining it documentation for your insurance claim
- Poke a controlled drain hole at the lowest point of the bulge using a screwdriver or awl
- Place buckets or towels to collect water as it drains
- Call an emergency roofing contractor this situation does not wait for business hours
- Do not attempt to patch the ceiling until the roof leak source has been professionally identified and repaired
Exterior signs of a developing roof leak are almost always visible before any interior damage appears. A regular walk around your property after significant rain events or hail storms takes less than 10 minutes and can catch problems while they are still a $500 repair rather than a $5,000 structural job. Here is what to look for.
Exterior Sign
Any section of the roof surface where the protective layer has been compromised is a potential or active water entry point. On asphalt shingle roofs, the most common roof type in San Antonio, the warning signs include shingles that are curling at the edges (cupping or clawing), shingles where the granule surface has worn away exposing the dark asphalt mat beneath, cracked shingles from UV degradation or hail impact, and shingles that are entirely missing following a wind event. Each of these conditions removes or degrades the water-shedding layer that the shingle is there to provide.
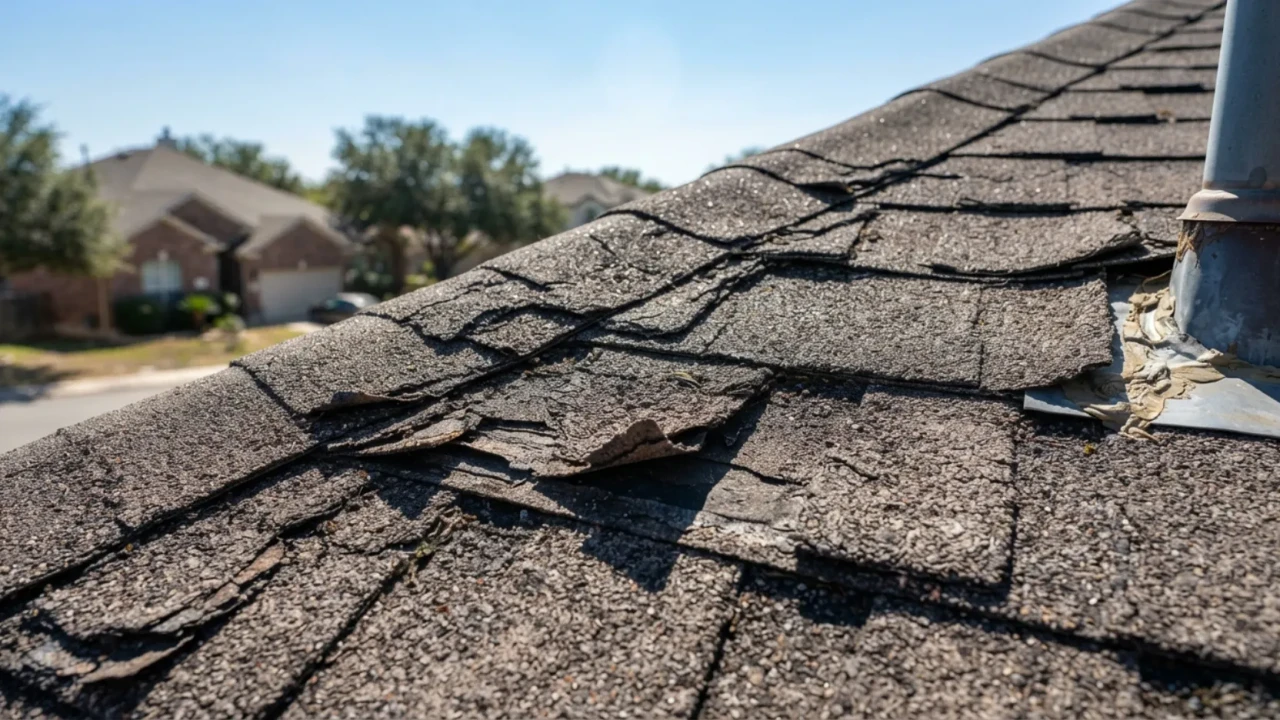
Asphalt shingle warning signs: Curling edges indicate the shingle has lost flexibility and is no longer lying flat against the roof deck. This creates gaps where wind-driven rain can be forced under the shingle. Granule loss in gutters and downspouts is normal for aging shingles but heavy granule accumulation in a short period signals accelerated weathering, often from hail impact. Missing shingles leave an unprotected section of underlayment or bare decking exposed to every rain event.
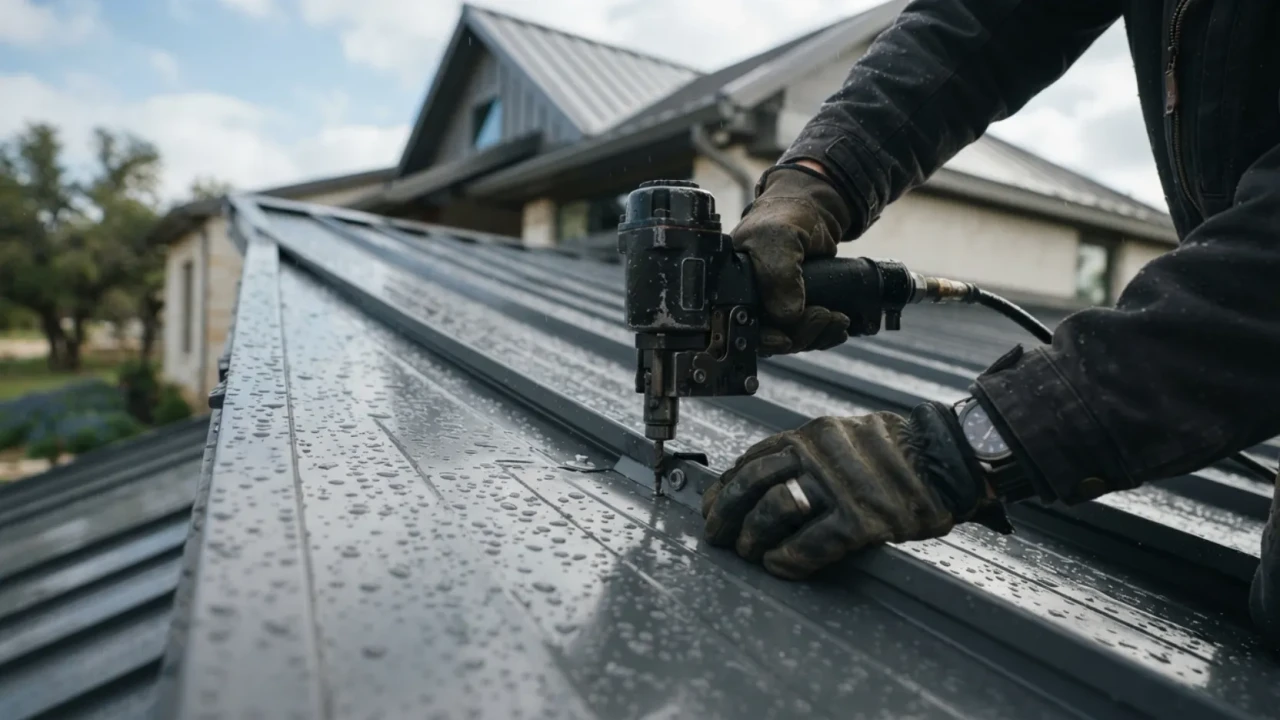
Metal panel warning signs: For San Antonio homes with metal roofing, look for visible rust streaking running down from the roof edge or from panel seams, lifted or missing ridge caps, panels that appear to have raised edges or separated seams, and any section where the panel appears to have been physically displaced from its fasteners.
- Walk the perimeter of the home and look for shingle pieces, granules, or tile fragments on the ground
- Inspect gutters for heavy granule accumulation this indicates shingle surface damage from above
- Look at gutter edges, downspouts, and window screens for hail denting a dented gutter means hail was large enough to damage roofing
- Use binoculars to inspect the roof slope from the ground do not get on the roof during or immediately after rain
- Note any areas where the roof profile looks uneven, lifted, or misaligned
- Check soffit and fascia for dark staining or paint peeling this indicates water overflowing from clogged or damaged gutters
Exterior Sign
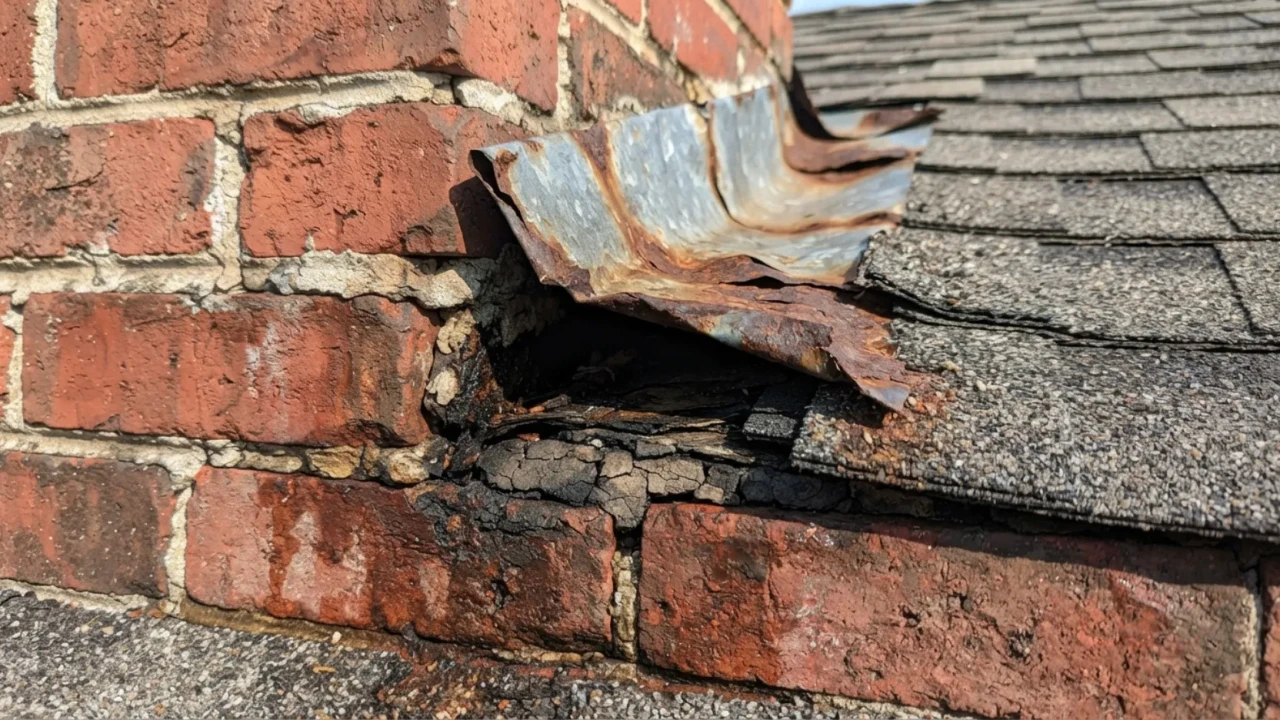
Flashing is the metal material installed at every point where the roof surface meets a vertical element: chimneys, skylights, vent pipes, HVAC curbs, dormers, and wall-to-roof junctions. It is the component most responsible for keeping water out at these transition points, and it is the component most likely to fail first. In San Antonio’s climate, where roof surfaces see temperature swings of 100 degrees or more between winter nights and summer afternoons, flashing sealants experience extreme expansion and contraction cycles that crack and separate them from the surfaces they bond to over time.
From the ground, look for visible gaps between the flashing and the chimney or wall surface, flashing that appears to have lifted away from the roof surface, rust-colored staining running down from any vertical roof penetration, and missing sections of step flashing where a dormer or addition meets the main roof slope. Any of these conditions is an active or imminent leak source.
Pipe boot failure is one of the most underdiagnosed sources of roof leaks in Bexar County. Every plumbing vent stack that penetrates your roof has a rubber or neoprene boot around it that creates a waterproof seal. Under San Antonio’s UV intensity and temperature extremes, these boots crack and split within 10 to 15 years on most roofs. The leak they create is small, slow, and perfectly positioned to send water directly down the vent pipe and into the wall cavity, where it can travel undetected for years. Inspect your pipe boots every two to three years and replace them proactively before they fail.
- Chimney flashing: check all four sides for gaps between the flashing and masonry, especially the uphill side
- Skylight perimeter: look for lifted flashing edges, cracked caulk, or visible gaps at the frame-to-roof junction
- All pipe penetrations: inspect rubber boots for cracking, tearing, or visible gaps at the pipe-to-boot seal
- Dormer walls: step flashing and counter-flashing should be continuous with no visible gaps or rust
- Roof valleys: metal valley liner should be continuous, free of rust, and seated fully under the roofing material on both sides
- HVAC curbs and roof penetrations: sealant should be intact around all mechanical equipment bases
Contributing Factor
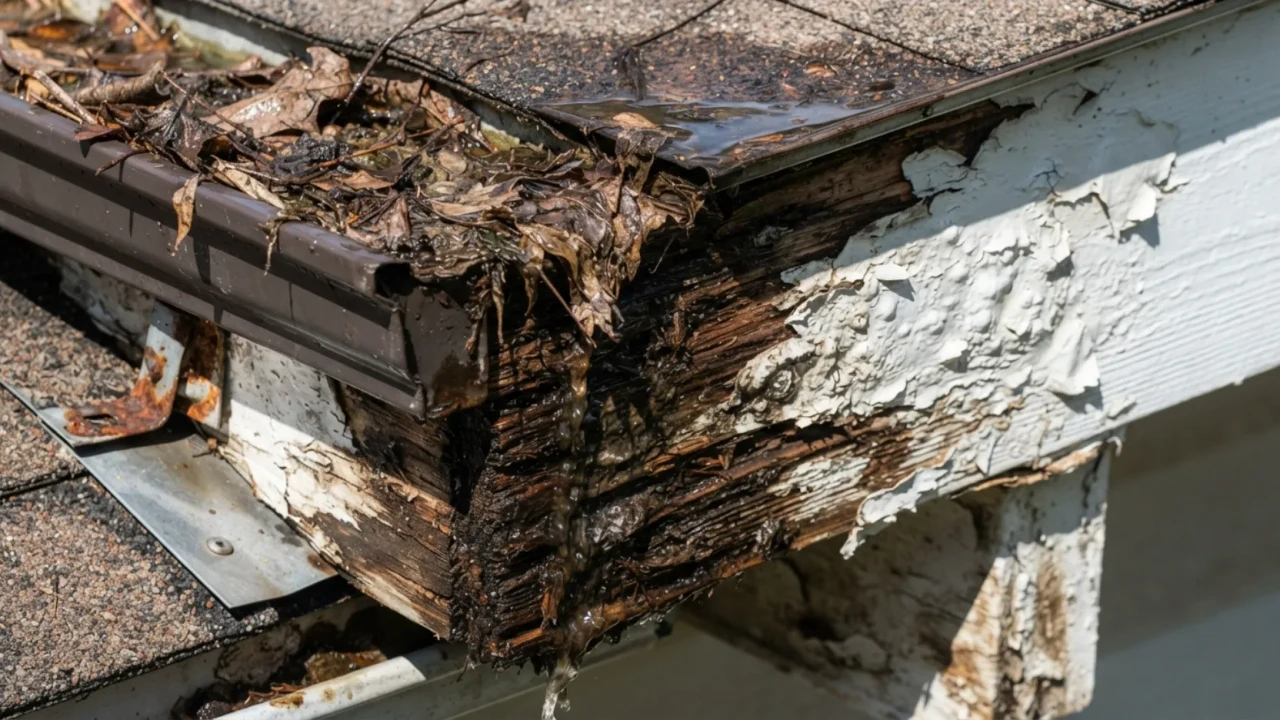
Gutters and the drainage system attached to your roof are not strictly part of the roof, but they create leak conditions that affect the roof assembly directly. When gutters are clogged with debris, water overflows the gutter edge and runs behind the fascia board, behind the soffit, and eventually into the roof decking at the eave. In a heavy San Antonio rain event, a completely clogged gutter can back up water against the bottom course of shingles or under metal panel edges for the duration of the storm, forcing water under the roofing material in a location that was never designed as a sealed waterproofing zone.
Ice dams are not a major concern in San Antonio, but summer rainstorms that dump two or three inches of rain in under an hour a regular occurrence in Bexar County from June through September create the same type of water backup scenario when gutters cannot keep up with drainage. Keeping gutters clear and properly pitched toward downspouts is a basic maintenance step that directly prevents a category of roof leaks caused by drainage failure rather than roofing material failure.
- Clear gutters of all debris at least twice per year more frequently for homes with large trees overhead
- During rain: observe gutter drainage to confirm water is flowing to downspouts and not overflowing the edge
- Check gutter pitch: water should not pool in any gutter section between storms look for standing water after rain clears
- Inspect fascia and soffit boards for softness, rot, or paint peeling these indicate sustained moisture contact
- Ensure all downspout extensions direct water at least four feet away from the foundation
- Check gutter hangers and spikes for pulling away from the fascia separated gutters tilt and overflow toward the house
Finding a leak sign is not a reason to panic. It is a reason to act quickly and in the right sequence. The steps below apply whether you are dealing with an active drip during a storm or a water stain you discovered on a dry afternoon. The order matters: rushing to repair before diagnosing correctly is the primary reason homeowners spend money on roof repairs that do not solve the actual problem.
First Response
The moment you identify an active leak or fresh water damage, your first priority is limiting the damage that is occurring right now. Move furniture, electronics, and anything of value away from the affected area. Place buckets or towels to collect dripping water and prevent it from saturating flooring or spreading to adjacent rooms. If a ceiling is bulging with pooled water, poke a controlled drain hole at the lowest point to release the pressure in a managed way rather than waiting for it to collapse.
At the same time, document everything. Photograph the water stain, the drip, the bulge, the wet insulation if you can safely access the attic, and anything else that shows the condition and extent of the damage. Note the date and time. If the damage occurred during or immediately after a storm, note the weather event. This documentation is the foundation of any insurance claim and protects you if a contractor dispute arises later about the condition of the home before they began work.
- All furniture, rugs, and electronics moved out of the water path or covered with plastic sheeting
- Date-stamped photographs taken of all visible damage before any cleanup or temporary repair
- Water collection containers placed under all active drip points
- Bulging ceiling sections drained with a controlled relief hole at the lowest point
- Wet drywall and insulation noted but left in place for the insurance adjuster to assess
- Storm date and weather event recorded for the insurance claim narrative
Temporary Fix
If the roof has a visible breach missing shingles, displaced panels, a puncture from a fallen branch, or a section that was physically damaged in a storm an emergency tarp is the correct immediate response. A tarp does not fix anything permanently, but it stops the immediate water entry and protects the roof deck and interior from additional damage while a contractor schedules the permanent repair. In San Antonio’s storm season, when significant rain events can follow one another within days, an unprotected breach can cause exponentially more damage waiting a week for a contractor than it did in the original storm.
Do not attempt to get on a wet or storm-damaged roof yourself to install a tarp. Wet roofing materials are slippery and structurally compromised surfaces can give way without warning. Emergency tarp installation by a licensed roofing contractor typically costs $200 to $600 and is almost always recoverable through a homeowner’s insurance claim when the damage was caused by a covered event. The risk of a fall from a residential roof far exceeds the cost of having a professional do this work.
- Do not attempt rooftop access on a wet or freshly storm-damaged roof yourself
- Call a licensed contractor for emergency tarp installation this is covered by most Texas homeowner’s insurance policies
- Confirm the tarp extends well past the damaged area on all sides, not just over the visible breach
- Keep receipts for all emergency tarping work these are part of the insurance claim documentation
- Do not remove or disturb the tarp before the insurance adjuster has assessed the damage
Diagnosis
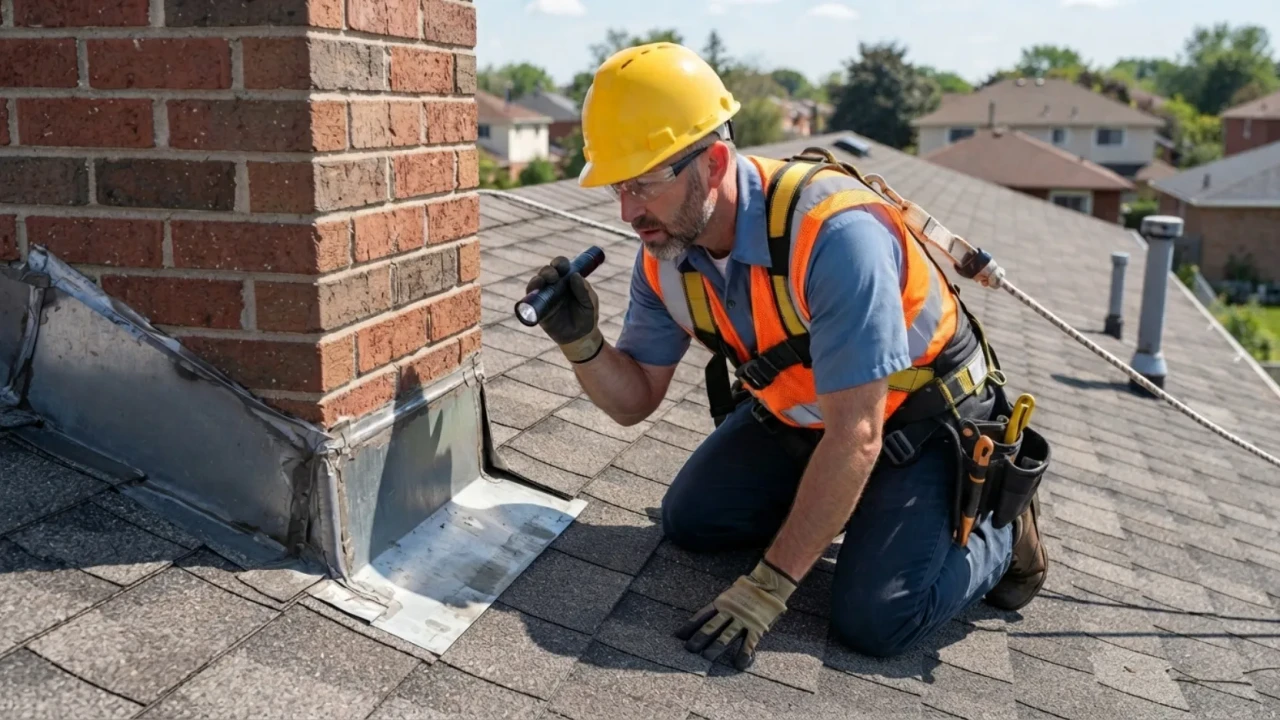
Once the immediate threat is contained, the most important next step is a professional inspection by a licensed roofing contractor who will physically get on the roof to identify the actual leak source. This is not the same as an insurance adjuster visit, and it is not something that should be skipped in favor of jumping directly to a repair quote. The diagnosis is the repair. Getting the diagnosis wrong means spending money on work that does not solve the problem.
A proper roof leak inspection in San Antonio includes walking the full roof surface to check every flashing, every penetration, every seam, and every section of roofing material for conditions that would allow water entry. It also includes an attic inspection from below to trace water staining patterns back toward the likely entry point. In some cases, a water test using a garden hose is conducted systematically from the lowest areas of the roof upward to isolate the specific entry point when the source is not immediately apparent.
Any contractor who gives you a repair quote without physically walking the roof has not completed a real diagnosis. This is the single most important hiring filter for San Antonio homeowners dealing with a roof leak. A phone quote, a quote from the attic only, or a quote based on photographs without a roof surface inspection is not a reliable scope of work. The best contractors in this market will walk the roof, explain what they found, show you photographs of the specific failure points, and give you a written scope before asking for a deposit. If a contractor skips the inspection, skip that contractor.
- Contractor physically accesses and walks the roof surface not an attic-only or photo-only inspection
- All flashings inspected at every penetration and transition point
- Attic inspection completed to trace water staining patterns from below
- Written inspection report provided with photographs of each identified failure point
- Repair scope itemized: specific materials and work to be done, not just a total dollar figure
- Warranty terms for both materials and workmanship stated in writing before any deposit is collected
Insurance
If your roof leak was caused or significantly worsened by a storm event hail, high winds, a fallen tree, or a severe rain event your Texas homeowner’s insurance policy likely covers the repair or replacement. Texas law gives policyholders specific rights in the claims process, including the right to an independent repair estimate from a contractor of your choosing and the right to dispute an adjuster’s assessment if you believe it is insufficient to cover the actual scope of damage.
The most important thing to know about the claims timeline is that Texas homeowner’s insurance policies typically require claims to be filed within one year of the storm event that caused the damage. Do not wait to see if the damage gets worse, and do not wait for a contractor to prompt you to file. If you saw significant hail or wind in your area, call your insurance company within 30 days and open a claim even if you have not yet had a professional inspection. You can provide the contractor’s damage documentation to the adjuster once the inspection is complete.
- Call your insurance company to open a claim within 30 days of the storm event do not wait for a contractor to prompt you
- Provide date-stamped photographs of all interior and exterior damage as part of the claim documentation
- Get an independent written repair estimate from a licensed San Antonio roofing contractor before the adjuster visit
- Do not sign an Assignment of Benefits (AOB) document you have the right to manage your own claim
- If the adjuster’s scope does not match the contractor’s documented damage, request a re-inspection or consult a public adjuster
- Keep records of all emergency tarping costs, temporary repairs, and additional living expenses caused by the damage
Use this table to quickly assess any leak sign you have found and determine the appropriate response timeline. All signs in the Urgent or Emergency category require a professional contact within 24 to 48 hours, not weeks.
| Sign You Found | What It Indicates | Urgency Level | First Action |
|---|---|---|---|
| Ceiling water stain, dry | Past or slow ongoing leak with multiple wet-dry cycles | High within 2 weeks | Photograph, schedule professional inspection |
| Active ceiling drip during rain | Active leak with direct water path through the roof assembly | Urgent same day | Contain water, document, call contractor |
| Sagging or bulging ceiling | Water pooled above drywall imminent collapse risk | Emergency immediate | Clear area, drain controlled hole, call emergency service |
| Musty attic odor, no visible stain | Early mold growth or sustained moisture in attic space | High within 1 week | Attic inspection, professional roof inspection |
| Visible mold on decking or rafters | Established biological damage from prolonged moisture | Urgent within 48 hours | Limit attic access, call roofer and mold remediator |
| Missing or curling shingles | Roof surface compromised active water entry risk | High before next rain | Document, call for inspection and repair quote |
| Flashing gap at chimney or skylight | Direct water entry point at every rain event | High within 2 weeks | Schedule flashing repair inspection |
| Granules in gutters after storm | Hail impact or age-related shingle surface degradation | Medium within 30 days | Schedule post-storm inspection for insurance documentation |
| Overflowing gutters during rain | Blockage creating water backup against eave and fascia | Medium next dry day | Clear gutters, inspect fascia and soffit for damage |
| Cracked or deteriorated pipe boots | Developing water entry point at plumbing penetrations | Medium within 60 days | Schedule pipe boot replacement during next roof maintenance visit |
- Date-stamped photographs taken of all visible damage interior and exterior
- Interior damage contained: furniture moved, buckets placed, bulging ceilings drained safely
- Storm event date recorded if damage followed a weather event
- Attic checked for visible moisture, staining, or mold if safely accessible
- Exterior walked for visible roofing material damage, missing components, and flashing gaps
- Insurance claim opened if the damage was caused by a storm event
- Professional inspection scheduled with a licensed San Antonio roofing contractor
- Contractor physically walked the roof not a quote based on attic inspection or photos only
- Written inspection report received with photographs and specific findings
- Written repair scope received: itemized materials, work description, and warranty terms
- Certificate of insurance received from the contractor and verified
- No Assignment of Benefits document signed
- Completed repair inspected and signed off before final payment
- Warranty document received with contractor contact and coverage period
- Interior damage repaired only after the roof leak source is confirmed fixed
- Next professional inspection scheduled: San Antonio roofs should be inspected every two to three years
- Gutter cleaning scheduled: at minimum twice per year going forward
- All insurance claim documentation filed and retained for your records
What are the most common signs of a leaking roof?
My ceiling has a water stain but it is not raining. Should I still be worried?
How do I find where my roof is leaking?
Does homeowners insurance cover roof leaks in San Antonio?
How long can I wait to fix a roof leak before it causes serious damage?
Can I repair a roof leak myself?
Suspect a roof leak in San Antonio? Get a free inspection today.
Do not wait through another rain event to confirm what you are already seeing. We will get on the roof, find the source, document the damage, and give you a clear written repair estimate at no charge.
[/et_pb_code][/et_pb_column][/et_pb_row][/et_pb_section]