
[et_pb_section fb_built=”1″ admin_label=”section” _builder_version=”4.16″ global_colors_info=”{}”][et_pb_row admin_label=”row” _builder_version=”4.16″ background_size=”initial” background_position=”top_left” background_repeat=”repeat” global_colors_info=”{}”][et_pb_column type=”4_4″ _builder_version=”4.16″ custom_padding=”|||” global_colors_info=”{}” custom_padding__hover=”|||”][et_pb_code _builder_version=”4.27.7″ _module_preset=”default” hover_enabled=”0″ sticky_enabled=”0″]
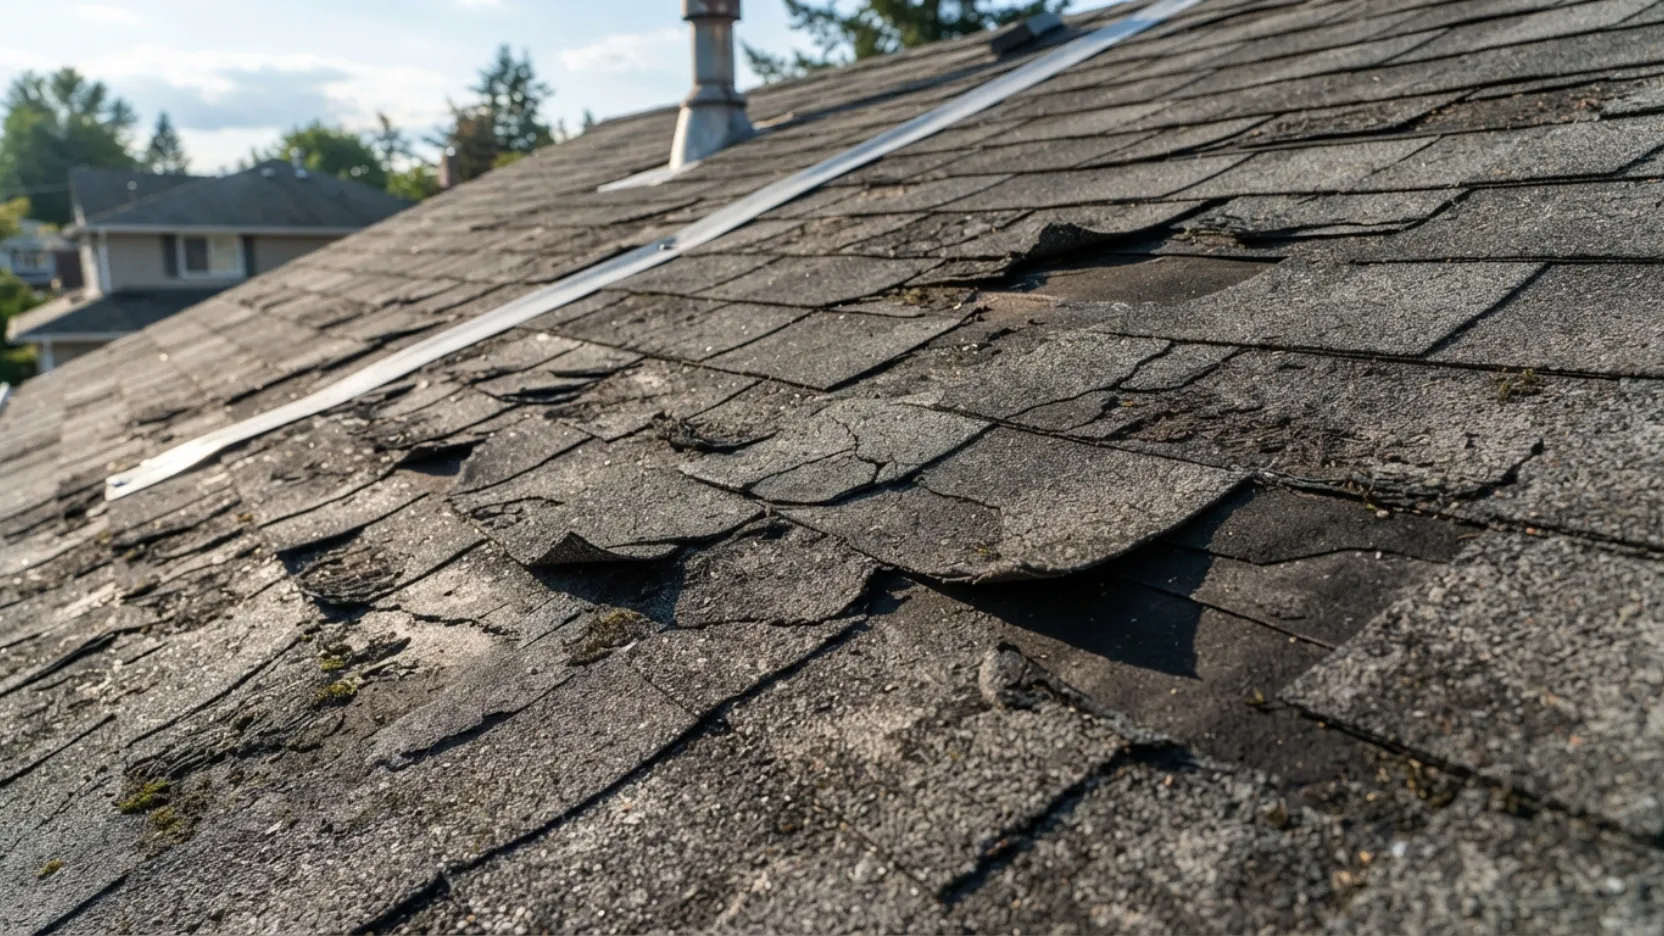
Most roof problems start small and stay hidden until they become expensive. This guide walks San Antonio homeowners through every warning sign to check, from the ground, in the attic, and inside the home, so you can catch damage early and act before a small repair becomes a full replacement.
A damaged roof rarely announces itself with a dramatic ceiling collapse. More often, it works against you quietly: a small crack in a sealant joint here, a lifted shingle tab there, a fastener that backed out two inches over three years of Texas heat cycles. By the time water shows up on your ceiling or walls, the damage above it has usually been building for months or longer.
The good news is that most serious roof damage is detectable well before it becomes expensive, if you know what to look for. This guide covers every category of warning sign that San Antonio homeowners should check: exterior signs you can spot from the ground or a safe vantage point, interior signs visible from the attic and inside the home, post-storm checkpoints, and the age and maintenance indicators that tell you a roof is approaching the end of its useful life. Work through each section and you will have a clear picture of your roof’s current condition without spending a dollar.
San Antonio homeowners who schedule a professional roof inspection after every significant hail or wind event and once per year as routine maintenance spend dramatically less on roofing over the life of their home than homeowners who only call a roofer when water appears on the ceiling. That ceiling stain represents weeks or months of water that has already traveled through your insulation, soaked into your decking, and potentially begun growing mold inside the roof assembly. The inspection is cheap. The remediation after deferred maintenance is not.
Exterior Signs
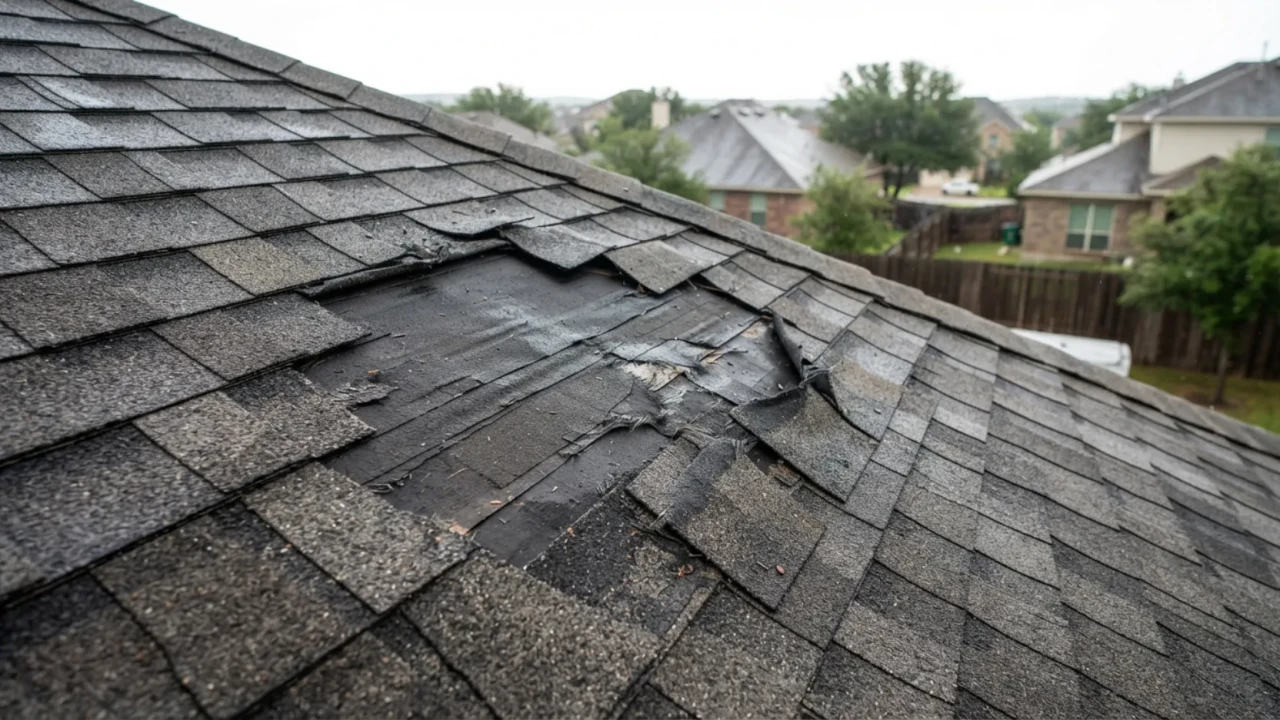
Surface-level roof damage is often visible from the ground or driveway with a pair of binoculars. You do not need to climb the roof to spot most warning signs.
The exterior surface of your roof is the first line of defense against San Antonio’s weather, and it is the first place to look for signs of deterioration. You do not need to climb onto the roof to perform a useful visual inspection. A clear day, a stable vantage point from your driveway or a neighboring elevation, and a pair of binoculars will let you identify most of the warning signs listed below.

Missing or displaced shingles: Any gap in the shingle field exposes the underlayment or roof decking directly to weather. Even a single missing shingle is an active vulnerability. High-wind events and older shingles with degraded adhesive strips are the most common causes in San Antonio.
Curling or cupping shingle edges: Shingles that curl upward at the edges or cup in the middle have lost their flat profile due to moisture imbalance, age, or poor ventilation. Curled shingles lift easily in wind and allow water to get under the tab, making them both a cosmetic and structural concern.
Blistering or bubbling surface: Bubbles or raised spots on asphalt shingles indicate trapped moisture or volatile compounds escaping from the asphalt layer. Blistered shingles are structurally weaker and more vulnerable to impact damage.
Sagging roof sections: This is the most serious exterior sign on this list. A roof section that visibly dips or sags between rafters indicates that the decking beneath has softened from moisture saturation, or that the structural framing below has weakened. This is not a cosmetic issue. A sagging roof section is a structural failure in progress and requires professional evaluation before the next rain event.
- Walk the perimeter of your home and look at all roof slopes from a safe ground-level position
- Use binoculars to identify missing, cracked, curling, or displaced shingles on steep slopes
- Check ridge cap shingles specifically: these are the first to lift in high-wind events
- Look for any sagging or dipping between roof sections, particularly on older homes
- Note any dark staining, moss, or heavy algae growth, especially in shaded north-facing areas
- Check the flashing at the base of chimneys, vents, and skylights for visible separation or rust
Interior Signs
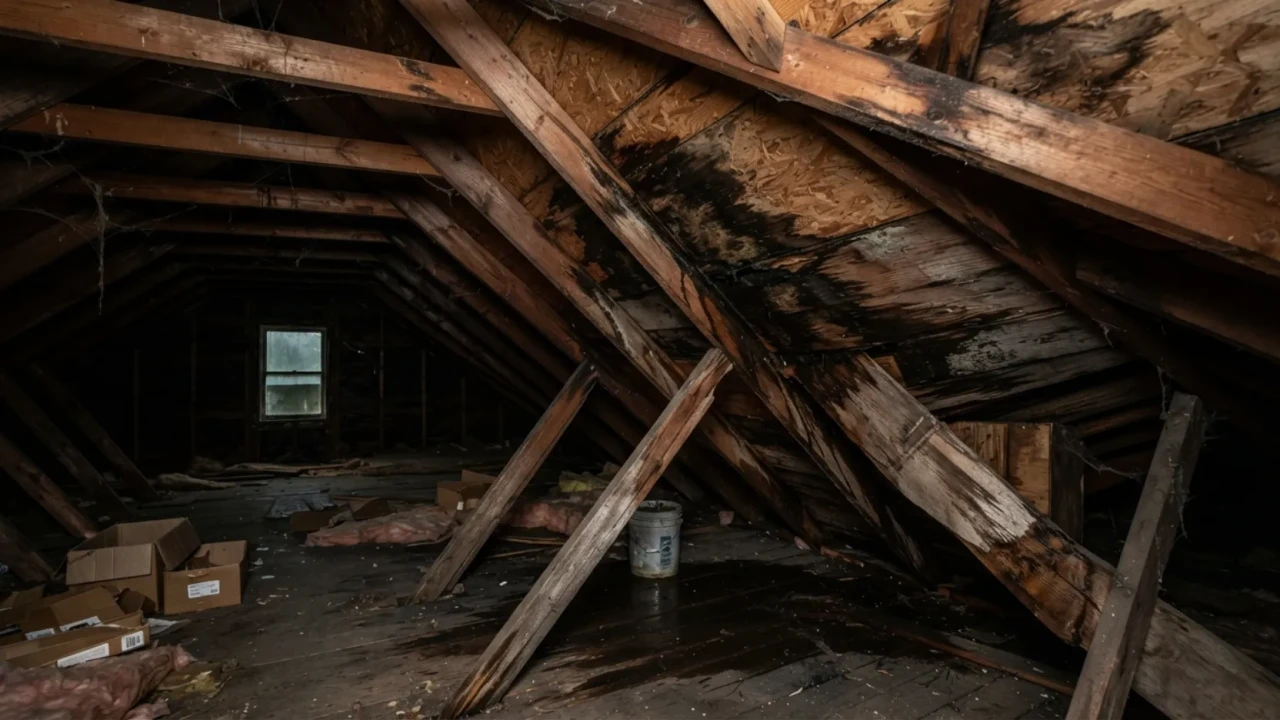
Water stains on attic rafters and decking are a reliable indicator of an active or past roof leak, often appearing long before the ceiling below shows any sign of damage.
Your attic is the most informative place to assess roof condition, and it is also the most overlooked. A visual inspection of the attic takes less than ten minutes and can reveal problems that may not appear on the ceiling below for months. Bring a flashlight, note where you see staining or discoloration, and photograph anything that looks abnormal before you call a contractor.
Water stains on rafters and decking: Dark staining, tide marks, or mineral deposits on roof rafters or sheathing boards indicate that water has gotten through the roof surface at some point. Fresh stains are darker at the edges. Old stains may have a gray or white mineral ring. Either tells you there is or was a breach in the roof assembly above.
Daylight through the roof deck: In a properly built roof, no daylight should be visible from the attic. Any pinhole or gap you can see light through is a gap that water can enter through. This test is most useful in a darkened attic on a bright day. Metal roofs with advanced corrosion sometimes reveal stage-three through-panel rust in this way.
Mold, mildew, or a musty odor: Mold growth in the attic is a sign of sustained moisture, whether from a roof leak, condensation caused by poor ventilation, or both. In San Antonio, a poorly ventilated attic in summer creates enough moisture from condensation alone to grow mold without any leak present. Either way, mold in the attic requires both a moisture source investigation and remediation before the mold spreads further into the roof assembly.
When you find a water stain on your attic rafters, do not assume the leak is directly above it. Water enters at one point but travels along the rafter or sheathing before it drips. The actual entry point is almost always higher up the roof slope and sometimes several feet to either side. Mark the stain’s location relative to a known structural reference (the chimney, a vent pipe, the ridge), then go outside and trace what is directly above and uphill from that reference. That is where a professional should start the leak investigation, not where the stain is.
- Enter the attic with a flashlight on a dry day and allow your eyes to adjust before inspecting
- Turn off the flashlight briefly and look for any pinhole daylight through the roof deck
- Inspect every rafter and ridge board for dark staining, tide marks, or active dampness
- Check the underside of the roof sheathing for soft spots, dark staining, or mold growth
- Smell for any musty or organic odor that might indicate mold growth out of sight
- Check insulation condition: compressed, wet, or discolored insulation indicates water has been above it
- Photograph any stains with your phone before calling a contractor to show where the damage appears
Interior Living Space
If roof damage has progressed to the point where you see signs inside your living space, the situation is more serious than a surface repair. Water that appears on a ceiling or wall has already traveled through the roof surface, the decking, the insulation, and the ceiling material above. Each layer it passed through may need to be assessed for damage, and mold may have already established itself in the layers you cannot see.
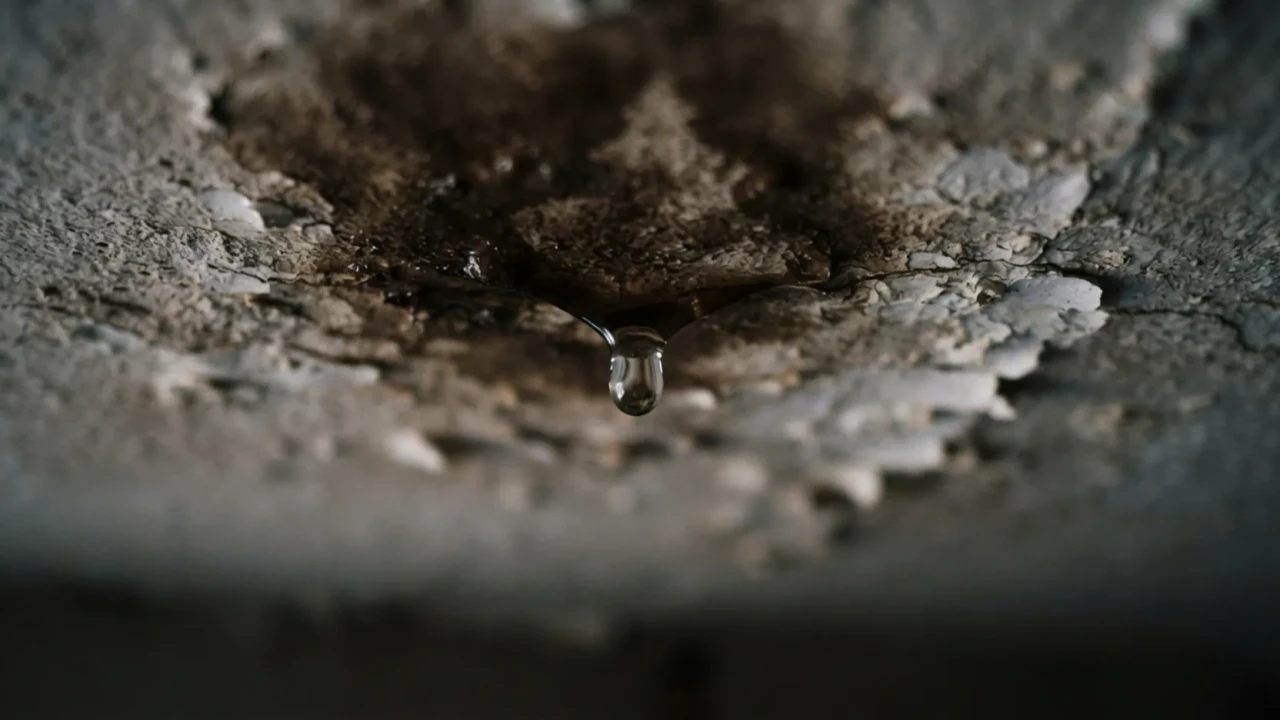
Brown or yellow ceiling stains: The classic roof leak indicator. A brown or yellowish ring stain on drywall or plaster is almost always caused by water that has soaked through from above and left a mineral deposit as it dried. A single stain could be from a past event that has since been repaired, but a fresh or growing stain indicates an active leak.
Bubbling or peeling paint on ceilings: Paint that bubbles up, blisters, or peels on a ceiling surface has water trapped behind it. The paint layer separates from the drywall as the moisture expands. This is often found around light fixtures and ceiling fans where water collects before it finds a path through.
Staining on walls near the roofline: Water stains on interior walls near where the roof meets an exterior wall indicate either a flashing failure at the eave or rake edge, or a soffit and fascia issue allowing water to track inside.
Sagging or soft ceiling drywall: A ceiling section that feels soft when pressed or visibly sags downward has absorbed enough water to lose structural integrity. Do not press on a heavily sagging ceiling panel. The weight of accumulated water above can bring down a section of drywall without warning. Evacuate the area, place a bucket below, and call a roofing contractor the same day.
- Walk every room with exterior-facing ceilings and look for any brown, yellow, or gray staining
- Check ceilings around light fixtures and ceiling fans where water tends to pool before dripping
- Press gently on any discolored ceiling section to feel for softness or give
- Check upper-floor walls near where the roofline meets the exterior for staining or peeling paint
- Smell for musty or organic odor in upper-floor rooms, especially closets that share a wall with the roofline
- After any rain event, check the same locations within 24 hours while any active intrusion would still be visible
Gutters and Drainage
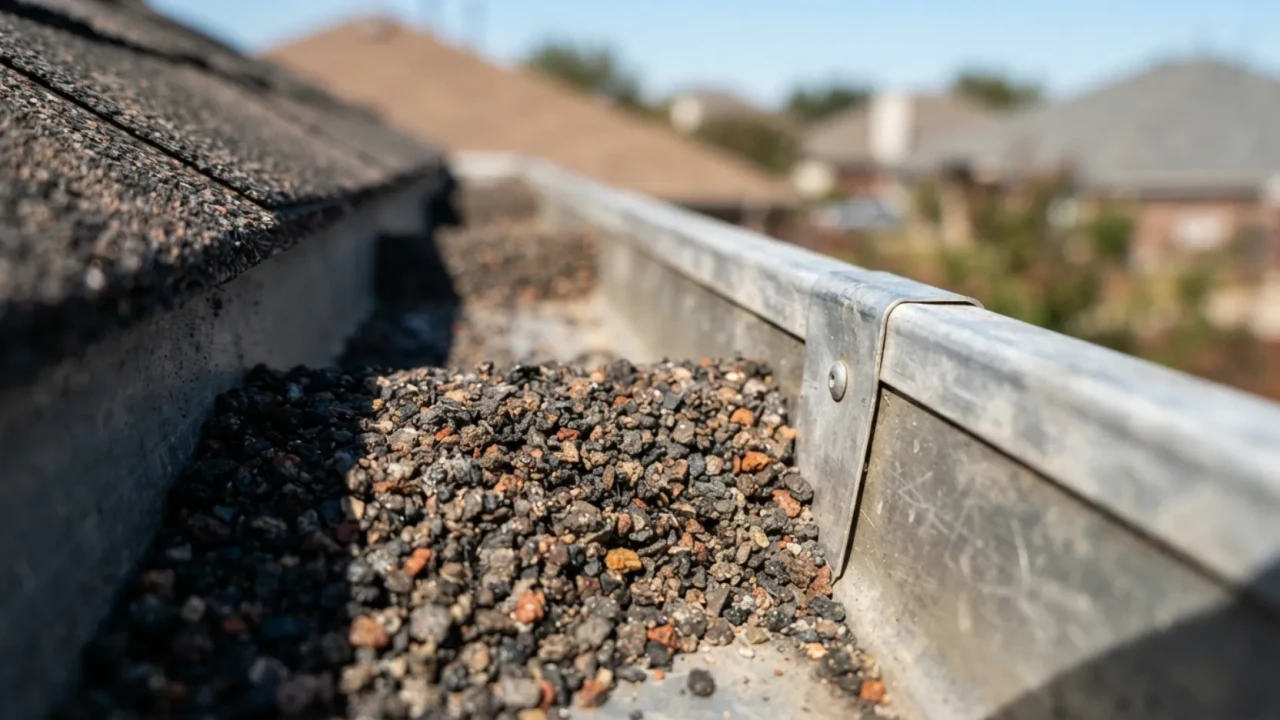
A significant accumulation of granules in the gutter is one of the clearest early warning signs that an asphalt shingle roof is approaching end of life. New roofs shed a small amount of granules; heavy granule loss after the first year is a concern.
Your gutters act as a collection system for everything that washes off your roof, which makes them an excellent diagnostic tool. After any significant rain or following a routine gutter cleaning, what you find in the gutter channels and downspout discharge areas tells a clear story about what is happening on the roof surface above.
Granule accumulation in gutters: Asphalt shingles are coated with mineral granules that protect the asphalt base from UV degradation. When the adhesive holding those granules fails due to age, impact damage, or manufacturing defects, the granules wash off the shingle surface into the gutters during rain events. A small amount of granule loss is normal on any shingle roof. Heavy granule accumulation in the gutters, particularly on a roof older than 12 to 15 years, means the protective coating on the shingles is failing and the bare asphalt beneath is now exposed to the San Antonio sun.
Gutters pulling away from the fascia: Gutters that sag or separate from the fascia board are often filled with debris, holding more weight than the hanger hardware can support. Beyond the gutter damage itself, a gutter that is no longer properly pitched toward the downspout holds standing water. That standing water sits against the fascia board and soffit, wicking moisture into the roof edge assembly and beginning a slow rot cycle in the wood components at the eave.
Run your hand along the bottom of your downspout discharge area after the gutters have been cleaned. A significant amount of dark, sand-like material in the discharge area or at the base of your downspout is granule loss from above. If you can fill a handful from one cleaning cycle, the rate of granule loss on your shingles is elevated. Document this with a photo and mention it at your next roofing inspection. It will help a contractor determine whether you are looking at a localized problem or system-wide shingle degradation.
- Clean gutters at least twice per year and note what you remove from the channels
- Check for granule accumulation: sand-like dark material at the bottom of the gutter or in the downspout discharge area
- Look for shingle fragments, which indicate tabs are cracking and breaking apart
- Check gutter pitch: water should not be standing in the channel after a rain
- Inspect every gutter hanger: gutters pulling away from the fascia need re-securing before water damage to the soffit begins
- Check the fascia board at the roofline for softness, rot, or paint peeling, which indicates chronic moisture at the eave
- Verify downspouts extend at least four feet from the foundation to prevent ground saturation near footings
Flashing and Penetrations
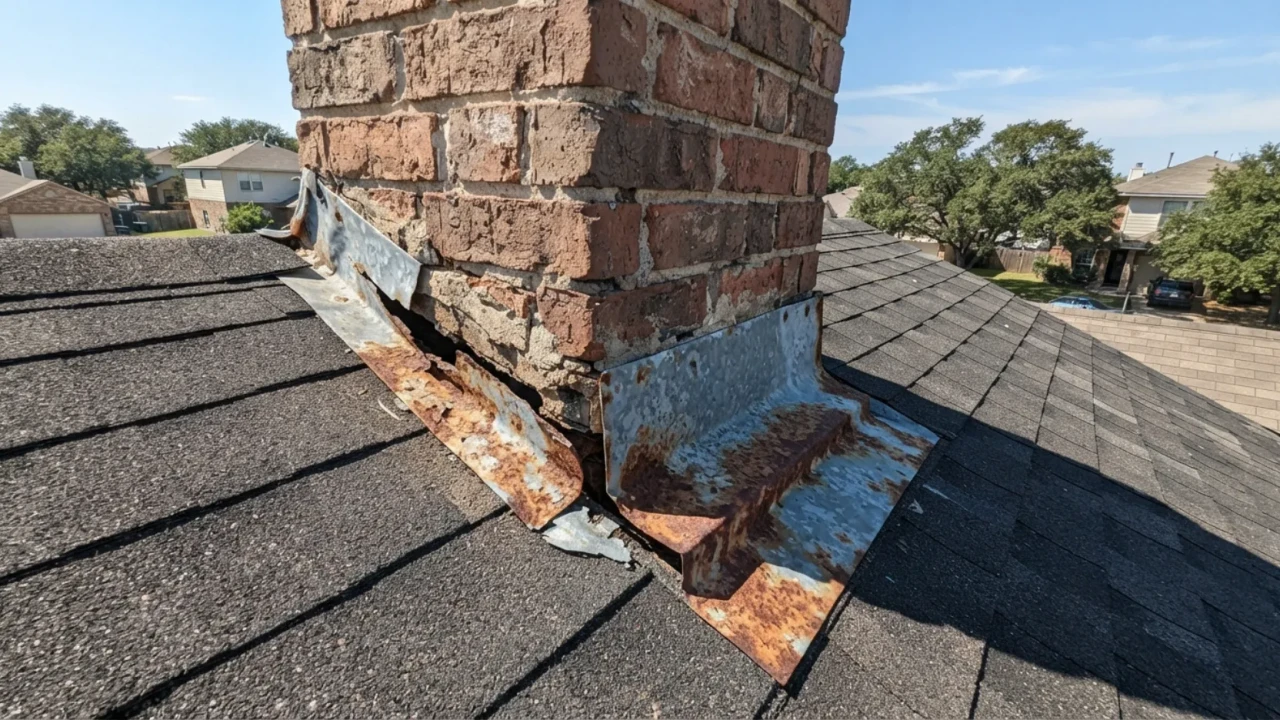
Flashing failure at chimneys, vents, and skylights is the leading source of roof leaks on San Antonio homes. The metal separates, corrodes, or loses its sealant bed over time, creating a direct water entry path into the roof assembly.
If you have ever had a roof leak that a contractor struggled to find, there is a good chance it originated at a flashing point. Roof flashing is the metal or composite material installed wherever the roof surface meets a vertical element: a chimney, a vent pipe, a skylight curb, an HVAC unit, a dormer wall, or a parapet. Every one of these transitions is a potential water entry point if the flashing separates, corrodes, or loses its sealant bed.
Flashing is made to last, but no flashing lasts forever. The combination of thermal expansion and contraction, galvanic corrosion when dissimilar metals contact each other, and the UV degradation of sealant materials means that even well-installed flashing in San Antonio will need attention every 10 to 15 years. The inspection is simple. The repair, when caught early, is affordable. The remediation when it is ignored is not.
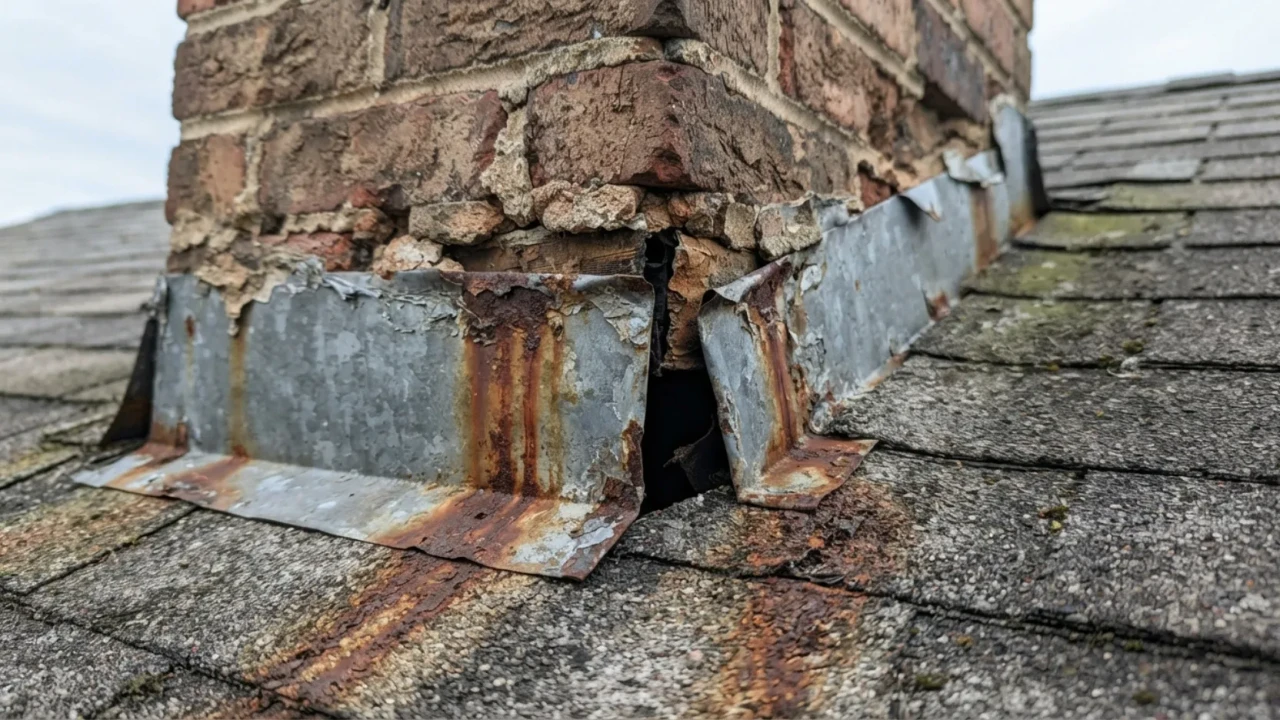
Chimney flashing separation: The flashing at the base of a chimney consists of step flashing along the sides and a counter flashing embedded in the mortar joints above. When the mortar joint cracks or the counter flashing pulls away, a gap opens directly into the roof assembly. This is one of the most common leak sources on San Antonio homes with masonry chimneys.
Vent pipe flashing boots: Every plumbing vent and exhaust pipe that exits through the roof is sealed with a rubber or neoprene boot around the pipe. These boots crack and shrink with age and UV exposure. A cracked vent boot is a very common cause of persistent leaks that appear nowhere near the vent itself because water travels down the pipe into the attic before it drips.
Skylight flashing and curb seals: Skylights are disproportionately frequent leak sources. The curb flashing, corner flashing pieces, and the sealant bed between the skylight frame and the curb all degrade over time. Inspect the interior of any skylight well for staining on the surrounding drywall.
- Inspect every chimney base from the ground with binoculars: look for visible gaps, rust staining, or lifted metal
- Check each plumbing vent and exhaust pipe boot for cracking, shrinkage, or separation at the base
- Inspect skylight wells from inside the home for water staining on the surrounding drywall or wood trim
- Check all roof valleys for debris accumulation that holds moisture against the valley flashing
- Look for rust streaking running down the roof surface below any metal flashing: this indicates active corrosion
- After any reroofing work, confirm in writing that all existing flashing was either replaced or inspected and resealed
Age and History
No inspection of the surface or the attic tells you more than a simple question: how old is this roof, and what material is it made from? Every roofing material has a documented expected service life in Texas climate conditions, and San Antonio’s combination of UV intensity, heat cycles, and hail season shortens that life compared to cooler markets. If your roof is approaching or has passed its expected lifespan in San Antonio conditions, warning signs should be treated as indicators of a system nearing end of life, not isolated problems to patch.
| Roofing material | National lifespan estimate | Realistic San Antonio lifespan | Inspection frequency recommended |
|---|---|---|---|
| 3-tab asphalt shingles | 20 to 25 years | 15 to 18 years | Annually after year 12 |
| Architectural (dimensional) shingles | 25 to 30 years | 18 to 22 years | Annually after year 15 |
| Metal (corrugated / screw-down) | 30 to 45 years | 25 to 35 years with fastener maintenance | Every 5 years for fastener inspection |
| Metal (standing seam) | 40 to 70 years | 40 to 60 years | Every 5 to 7 years |
| Clay or concrete tile | 50 to 100 years | 40 to 70 years (tile) / shorter for underlayment | Annually for underlayment after year 20 |
| Wood shake | 20 to 30 years | 12 to 18 years in San Antonio humidity | Every 2 years |
Maintenance history matters as much as age: A 20-year-old roof with a documented maintenance history, annual inspections, and prompt repairs will outperform a 12-year-old roof that has never been touched. When you purchase a home, ask for the roof age and any available maintenance records. In the absence of records, a professional inspection by a licensed San Antonio roofing contractor is the fastest way to assess where the roof actually stands relative to its expected remaining life.
Multiple repairs on the same area: If a single area of your roof has been repaired two or more times, that pattern tells you something important. Either the original repair was not performed correctly, the underlying structure at that location has a persistent problem, or the roof system in that area has reached end of life. A third repair on the same spot is almost always a signal to get a full professional assessment of whether the rest of the roof is in a similar state.
- Confirm the roof installation date from permits, home inspection reports, or prior owner documentation
- Calculate remaining life using the San Antonio lifespan column above, not the manufacturer’s national estimate
- Review any maintenance or repair records: look for repeat repairs on the same location
- If roof age is unknown, schedule a professional inspection before the next storm season
- For asphalt shingle roofs older than 15 years in San Antonio, treat any one warning sign as a reason to schedule a full inspection, not just a spot repair
- Ask any contractor quoting a repair whether the remaining expected life of the roof justifies the repair investment or whether replacement is the better long-term value
San Antonio sits in one of the most active hail corridors in the United States, and significant wind events from Gulf moisture systems are a regular part of the Texas weather calendar. After any storm where hail was one inch or larger in diameter, or where sustained winds exceeded 50 mph, treat a roof inspection as required rather than optional. You have a limited window under most Texas homeowner insurance policies to file a storm damage claim, and damage that goes undocumented in that window may become your financial responsibility regardless of the cause.
| What to check | How to check it | What it tells you | Urgency |
|---|---|---|---|
| Gutters and downspouts | Ground-level visual, check for denting | Hail that dents aluminum gutters had enough size to damage roofing material | Immediate indicator |
| Granules in gutters | Check gutter channels after the rain | Hail impact loosened granules from shingles | Schedule inspection within 30 days |
| Ridge cap shingles | Binoculars from the ground | First shingles to lift or blow off in high-wind events | Repair within 7 days if missing |
| Visible shingle damage | Binoculars from ground; scan all slopes | Bruising, cracking, or missing tabs indicate impact damage | Schedule professional inspection |
| Attic after the storm | Flashlight inspection within 48 hours | Any new staining or daylight gaps indicate a fresh breach | Same-day contractor call if active |
| HVAC, vents, and skylights | Ground-level and binoculars | Penetration covers and flashing take direct impact and can shift | Within 14 days |
| Flashing at chimney base | Binoculars from the ground | Wind can pull flashing away from mortar joints | Within 14 days |
Texas homeowners are entitled to an independent professional roof inspection separate from the insurance company’s adjuster review. After a major hail event in San Antonio, adjusters can be backlogged by weeks. Getting a contractor’s documented assessment early gives you a second set of eyes, protects you if the adjuster misses damage, and ensures you have dated photographic evidence of the condition of your roof before anything changes. A reputable San Antonio roofing contractor will not charge you for a post-storm inspection, and a written inspection report is your best tool in any insurance negotiation that follows.
- Walk the full perimeter and inspect each roof slope with binoculars
- Check for missing, cracked, curling, or displaced shingles on all slopes
- Look at ridge cap condition: first place to show wear and first to lift in wind
- Look for any sagging, dipping, or uneven profile in any roof section
- Note any staining, moss, algae, or dark streaking on the surface
- Inspect visible flashing at chimney base, skylights, and vent pipes from the ground
- Clean and inspect gutters and look for granule accumulation, shingle fragments, or rust deposits
- Confirm gutters are pitched correctly and not holding standing water
- Check every gutter hanger and confirm gutters are tight against the fascia
- Inspect fascia boards for softness, rot, or paint failure indicating moisture at the eave
- Confirm downspouts extend far enough from the foundation
- Enter attic with a flashlight and check all rafters and ridge board for staining
- Look for any daylight through the roof deck with the flashlight off
- Check insulation condition for compression, discoloration, or wet spots
- Smell for any musty or mold odor
- Note and photograph any staining for your contractor visit
- Check all upper-floor ceilings under exterior roof sections for staining or paint failure
- Inspect around ceiling light fixtures and fans where water pools before dripping
- Check upper walls near the roofline for staining or damp smell
- Press gently on any discolored ceiling section and check for softness
How do I know if my roof needs repair or full replacement?
Can I inspect my own roof or do I need a professional?
My ceiling has a water stain but it dried out. Do I still need a roof repair?
How often should I have my roof professionally inspected in San Antonio?
What does hail damage actually look like on a roof?
Is a small roof leak a big deal?
Not sure if your roof needs repair? Get a free inspection.
Tell us what you are seeing, whether it is a ceiling stain, a granule buildup in the gutters, or just a roof that has not been looked at in years. We will inspect it at no cost, document the condition, and give you an honest written assessment of what it needs.
[/et_pb_code][/et_pb_column][/et_pb_row][/et_pb_section]