
[et_pb_section fb_built=”1″ admin_label=”section” _builder_version=”4.16″ global_colors_info=”{}”][et_pb_row admin_label=”row” _builder_version=”4.16″ background_size=”initial” background_position=”top_left” background_repeat=”repeat” global_colors_info=”{}”][et_pb_column type=”4_4″ _builder_version=”4.16″ custom_padding=”|||” global_colors_info=”{}” custom_padding__hover=”|||”][et_pb_code _builder_version=”4.27.7″ _module_preset=”default” hover_enabled=”0″ sticky_enabled=”0″]
Installing metal roofing over existing shingles is legal in Texas, skips the costly tear-off, and can add decades of life to a home. This guide walks through every step of the process, the materials required, the mistakes that cause failures, and what San Antonio homeowners need to know before the first panel goes up.
Installing metal roofing directly over existing asphalt shingles is one of the most practical upgrades a San Antonio homeowner can make. You avoid the labor cost and landfill fees of a full tear-off, you get a second weather barrier during the transition, and the finished product outperforms the original shingles in every category that matters in Texas: heat resistance, wind rating, hail durability, and lifespan.
But this installation method only works well when it is done correctly. The wrong batten spacing, skipping the furring strips, using the wrong fastener length, or ignoring a damaged decking section underneath can turn a smart upgrade into an expensive problem. This guide covers each step in the correct order, with the specific details that matter for San Antonio homes and the Texas climate.

Texas building codes in most jurisdictions, including San Antonio and Bexar County, allow a maximum of two roofing layers on a residential structure. If your home already has two layers of shingles, you must do a full tear-off before installing metal. You also need to confirm that your roof decking and rafters can handle the added weight of the metal panel system plus the furring strips or battens. An inspection by a licensed San Antonio roofing contractor before the project begins is the only reliable way to confirm both of these requirements.
Inspection
The inspection step is the one most homeowners want to skip or rush through. Do not. Everything that goes wrong with a metal-over-shingles installation in the first five years traces back to a condition that was present during inspection and either missed or ignored. You are about to put a 40-year roof on top of this structure. What is underneath needs to be solid.

Check the layer count first. Get into the attic and look at the rafters and decking. Count the shingle layers at the eave edge where they are easiest to see. If you find two existing layers of shingles, the project becomes a full tear-off before metal installation, not an overlay. Installing a third layer is not permitted under San Antonio building codes and creates a structure that no inspector will approve.
Probe the decking for soft spots. From the attic, press firmly against the decking boards or plywood in multiple locations across the roof area. Soft, spongy, or visibly rotted sections must be replaced before installation begins. Water that got past the shingles over the years collects in low spots and at poorly flashed penetrations. These areas are exactly where future problems develop.
- Layer count confirmed from the attic at the eave edge: one layer present only
- Decking probed for soft spots in all four quadrants of the roof
- Rafter tails inspected at the eave for rot and deterioration
- All active leak stains in the attic investigated and sources identified
- Existing flashing around chimneys, vents, and skylights evaluated
- Shingle surface walked and checked for badly curled or buckled sections
- Ridge cap condition noted: deteriorated ridge cap indicates age and UV exposure below
Permits
A full metal roof installation in San Antonio requires a roofing permit from the City of San Antonio Development Services Department or the relevant Bexar County authority depending on whether your property is inside or outside city limits. This is not optional and it is not something to skip to save a few hundred dollars in permit fees. An unpermitted metal roof creates real problems: your homeowners insurance may deny a future claim if work was done without a permit, and the roof will have to be documented or potentially re-inspected when you sell the property.
The permit process for a residential metal roof overlay in San Antonio typically requires a completed application, a contractor license number if a licensed contractor is doing the work, and a basic project description including the roof square footage and material type. The permit fee is usually based on the project value. Most straightforward residential metal overlay projects are reviewed within a few business days.
Verify wind rating requirements before selecting your panel system. San Antonio sits in an area with design wind speeds that require roofing systems to meet specific wind uplift ratings. Metal panel profiles vary significantly in their tested wind resistance. A corrugated panel installed with exposed fasteners at 12-inch spacing has a different wind uplift rating than a concealed-fastener standing seam panel. Your panel choice and fastener schedule both need to align with the local wind design requirements, which your contractor should confirm before the material is ordered.
- Permit application submitted to San Antonio Development Services or appropriate Bexar County authority
- Wind uplift requirements for your zip code confirmed and matched to your panel system’s tested rating
- Maximum allowable roofing layers confirmed as two in your jurisdiction
- Permit posted at the job site before any installation work begins
- Final inspection scheduled before the project is considered complete
Battens
This is the most important structural step in a metal-over-shingles installation and the step most often skipped by shortcuts. You do not nail metal panels directly to the existing shingles. You install a system of horizontal wood furring strips (battens) across the entire roof surface first. These battens serve three critical functions: they create a flat, level nailing surface independent of the irregular shingle surface below; they provide an air gap between the metal and the shingles that allows heat to dissipate and prevents moisture from becoming trapped; and they give the metal panels a structural fastening point that reaches the roof decking, not just the soft shingles.

Batten material: Use pressure-treated 1×4 or 1×3 lumber for battens. The pressure treatment is critical in San Antonio’s climate because moisture can still get behind metal panels at penetrations and edges, and untreated wood that stays damp will rot within a few years. Do not use standard dimensional lumber for battens on a Texas roof.
Batten spacing: Spacing depends on your panel profile and manufacturer specifications. For most corrugated and ribbed panels, batten spacing runs 24 inches on center from the eave up the slope. Standing seam systems often use a tighter spacing. Always follow the specific installation instructions for your panel system since spacing affects both the structural performance and the warranty validity.
Snap chalk lines across the roof surface before nailing battens. The existing shingles give you no reliable reference for level. Running a chalk line at each batten location ensures they are parallel to each other and to the eave, which means your metal panels will run straight and look right when the job is done. A batten that wanders even a half inch out of level will telegraph into visible waviness in the finished panel surface. Take the extra twenty minutes to snap the lines before you start nailing.
- Batten lumber is pressure-treated, not standard dimensional lumber
- Chalk lines snapped at each batten location before nailing begins
- Batten spacing matches the panel manufacturer’s installation specification
- Fasteners are long enough to penetrate through the shingles and into the roof decking below
- Double batten or solid blocking installed at the ridge for a strong fastening point
- Eave batten positioned to provide correct overhang for the starter panel
- All battens checked for level and alignment before panel installation begins
Flashing
Every edge, valley, and penetration on the roof needs its trim and flashing installed before the first metal panel is placed. This is not optional and the order cannot be reversed. Panels that are installed before their edge trim is set will need to be removed to install the trim correctly, and trim that is slid under an existing panel never seals as well as trim that is installed first.

Eave trim (drip edge): The eave trim runs the full length of each eave and directs water away from the fascia and into the gutter. It is fastened to the eave batten and must be set to the correct overhang before any panels are installed. The first panel’s bottom edge will overlap the eave trim, not the other way around.
Rake trim: The rake trim covers the sloped edge of the roof at the gable ends. It is installed along the outer edge of the last batten on each side of the roof. Rake trim is typically fastened through pre-drilled holes every 12 to 18 inches and should be set to overhang the gable fascia by the amount specified in your panel system’s installation guide.
Valley flashing: Valleys are the highest-risk areas on any roof for water intrusion. Valley flashing for a metal roof over shingles is typically a W-profile or open-valley sheet metal section that runs the full length of the valley from ridge to eave. It is set over the existing shingles in the valley and under the first panels on each side.
- Eave trim installed and fastened along all eaves before any panels are placed
- Rake trim positioned at both gable ends with correct overhang over the fascia
- New valley flashing installed over existing valley material in all roof valleys
- All trim pieces sealed at overlapping joints with appropriate butyl tape or sealant
- Existing chimney, vent, and skylight flashing evaluated for replacement before panels go on
Panel Install
Panel installation always starts at the bottom of the slope (the eave) and works upward toward the ridge. For most corrugated and ribbed panel profiles, you start at the right or left edge of the roof depending on which direction your panels overlap. The manufacturer’s installation guide will specify the correct starting edge for your profile since getting this wrong means every panel overlap runs the wrong way relative to prevailing wind direction.

Positioning the first panel: The first panel must be perfectly square to the eave edge and must overhang the eave trim by the amount specified in the installation guide, typically 1 to 2 inches. Measure diagonally from two corners of the panel to confirm it is square before fastening. A first panel that is even slightly out of square will result in an increasingly noticeable drift as panels are added across the roof.
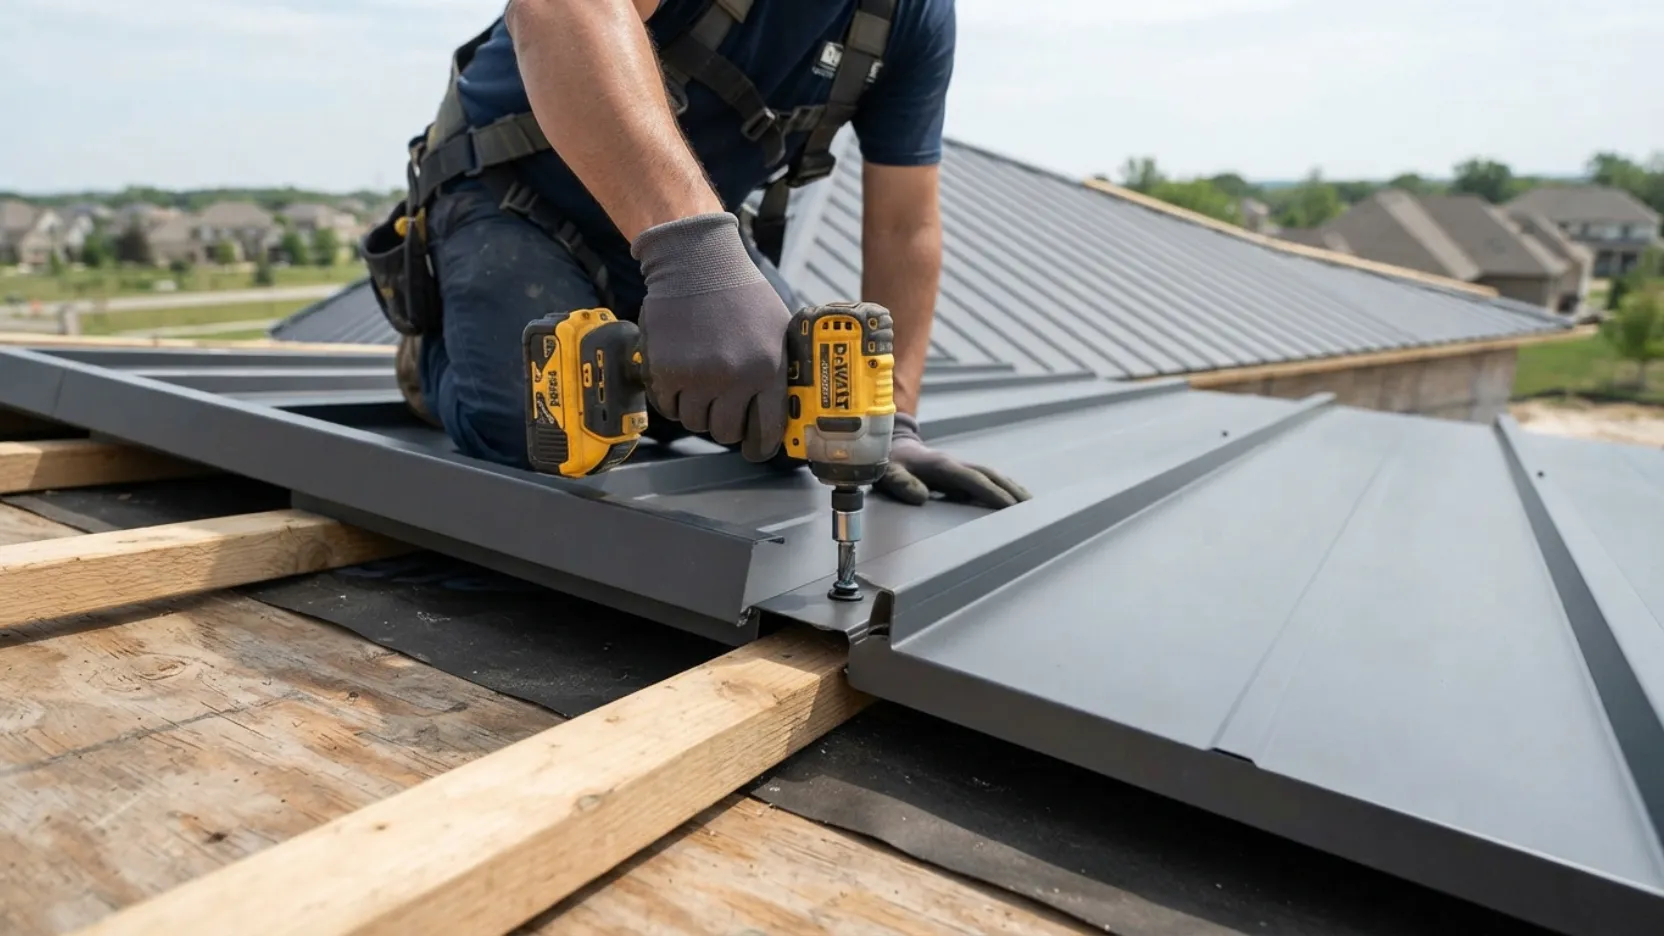
Fastening schedule: Use the correct roofing screws for your panel type. For exposed-fastener panels (corrugated, ribbed, R-panel), use hex-head screws with EPDM rubber washers. Drive them through the high rib of the panel, not the flat section between ribs. Fasteners in the low flat section create a potential leak point at every screw. Screws go into every batten the panel crosses, at the intervals specified in the installation guide.
Check squareness every three to four panels by measuring from the rake trim to the panel edge. This measurement should remain constant as you move across the roof. If it drifts, correct it slightly over the next two panels rather than trying to snap it back in one move. Small drift corrections are invisible in the finished roof. A large correction at the last panel shows clearly and cannot be hidden by trim. Checking frequently means you catch and correct small problems before they become large ones.
- First panel squared to eave edge and confirmed diagonal before fastening
- Starting edge and overlap direction confirmed in panel manufacturer’s installation guide
- Eave overhang set to correct dimension before first fastener is driven
- Fasteners driven through high rib, not flat section, on exposed-fastener profiles
- Squareness checked every three to four panels against the rake trim measurement
- Screw torque set correctly: EPDM washer should compress slightly without being over-driven
- End laps between panels in the same run set to minimum 6 inches and sealed with butyl tape
Flashing
Every pipe, vent, chimney, skylight, and HVAC curb that penetrates the roof plane requires new flashing when the metal roof is installed. The existing asphalt shingle flashing at these locations is not reused. Metal roofing panels are cut to fit around penetrations and new metal flashing components designed specifically for the panel profile are installed to create a watertight seal at every penetration.
Pipe boot flashings for round penetrations (plumbing vents, exhaust pipes) are available in metal and flexible rubber versions. The flexible rubber pipe boot that simply slips over a pipe and lays flat against the shingle surface does not work correctly on a ribbed or corrugated metal panel because the panel surface is not flat. Use the pipe boots designed specifically for metal roofing, which include a foam or metal closure piece that fills the ribs around the pipe and creates a proper seal.

Chimney flashing on a metal roof requires both base flashing (the piece that goes against the face of the chimney and under the panel edge) and counter flashing (the piece that is cut into the chimney mortar joint and laps over the base flashing). This two-piece system allows the chimney and the roof to move independently of each other, which matters in San Antonio’s temperature swings. A single rigid piece of flashing sealed to both the chimney and the panel will crack or separate over time.
- All existing pipe boot and vent flashings removed and replaced with metal-roofing-specific versions
- Pipe boots include foam or metal closure strips that fill panel ribs around each pipe
- Chimney base flashing installed under panel edges and sealed to chimney face
- Chimney counter flashing cut into mortar joint and lapping over base flashing
- HVAC curb flashing includes both upslope and downslope sections with correct overlaps
- All flashing sealed at laps with panel-compatible butyl tape or urethane sealant
- Skylight curb flashing replaced with new metal flashing compatible with the panel profile
Ridge Cap
Once all panels are in place and all penetrations are flashed, the ridge cap closes the roof at the peak. The ridge cap on a metal roof is a formed sheet metal piece that sits over the top of the panels on both sides of the ridge and is fastened through the panel surface into the double batten below. The ridge cap must be installed over a closure strip that fills the gap between the ribbed panel and the underside of the cap. Without this closure strip, the space under the ridge cap becomes an open highway for wind-driven rain, insects, and birds to enter the space between the panels and the shingles below.

Closure strips are pre-cut foam pieces shaped to match the specific profile of your panel. They come in inside closure (flat side down, against the panel) and outside closure (shaped side out, against the ridge cap). For ridge cap applications, you need the outside closure strip on the top edge of each panel run before the cap goes on. These must be ordered for your specific panel profile since a generic foam strip will not fill the ribs correctly.
Hip caps work the same way on hip roofs, running along each hip rafter from the ridge point down to the eave corner. Hip cap installation requires the same closure strips and is done before the ridge cap is installed so that the ridge cap can lap over the top of the hip caps.
Apply a bead of urethane sealant along the inside of the closure strip before pressing it against the panel. The foam closure alone provides a good seal but the sealant fills any small gaps created by panel surface irregularities. This is a two-minute step that adds meaningful protection at the ridge, which is the point on the roof exposed to the highest wind pressures. Use a sealant that is compatible with both the foam closure material and the metal panel coating, which your panel supplier can confirm.
- Outside closure strips installed on the top edge of panels on both sides of the ridge
- Closure strips confirm correct profile match for the specific panel being used
- Urethane sealant applied to inside face of closure strips before they are pressed to panel
- Hip caps installed on all hip rafters before ridge cap is applied
- Ridge cap overlaps hip caps at each intersection
- Ridge cap fasteners driven into the double batten below at the specified spacing
- Ridge cap end pieces sealed and capped at each end of the ridge run
Final Check
Before the crew leaves and before you sign off on the project, walk the entire roof system from ground level on all sides and from the roof itself if it is safe to do so. You are looking for a short list of specific issues that are easy to address when the crew is still on site and much more difficult to deal with after they have packed up and left.

Metal shavings from drilling and cutting panels are one of the items most often missed at final cleanup. Steel shavings left on the roof surface will rust within the first rain event and leave brown streaks down the panels. They are easy to see and sweep off before the job is signed off; they are difficult to deal with once they are embedded in a rust stain on a new panel coating.
Post-installation, metal roofing over shingles in San Antonio benefits from an annual visual inspection, particularly after any significant hail event. The panels themselves require very little maintenance, but the sealant at penetrations, trim joints, and ridge closures should be checked every three to five years and refreshed where any cracking or separation is visible.
- Panel alignment checked from all four sides of the roof from ground level
- All fastener heads visible and confirmed not over-driven with washers intact
- All trim laps and end joints sealed with no visible gaps or open sections
- Ridge cap and hip cap closures confirmed fully seated against panel surface
- All penetration flashings confirmed seated and sealed around the full perimeter
- Roof surface swept clear of all metal shavings before crew departs
- Gutters checked and cleared of any debris from the installation
- Permit inspection scheduled and job documentation filed for warranty purposes
These cost ranges reflect 2026 San Antonio market pricing for a standard residential metal-over-shingles installation on a simple gable roof of 20 to 30 squares. Complex roof shapes with multiple valleys, hips, and penetrations will add to both material and labor costs.
| Material or cost item | Typical range (2026) | Notes |
|---|---|---|
| Corrugated or ribbed steel panels (26 gauge) | $1.50 to $3.00 per sq ft | Price varies by profile, coating, and color. Galvalume is the base; painted finishes add cost. |
| Standing seam panels (26 gauge) | $3.50 to $7.00 per sq ft | Higher material and labor cost than exposed fastener panels. Superior wind and leak performance. |
| Pressure-treated batten lumber (1×4) | $0.60 to $1.00 per linear ft | Required for all over-shingles installations. Do not substitute with untreated lumber. |
| Eave trim, rake trim, and ridge cap | $1.50 to $3.50 per linear ft | Should match panel color and coating system. Typically sold by the linear foot. |
| Valley flashing | $2.00 to $4.00 per linear ft | W-profile or open valley flashing in Galvalume or painted steel. |
| Roofing screws with EPDM washers | $0.10 to $0.25 per screw | Budget approximately 80 to 120 screws per square of panel for exposed-fastener profiles. |
| Pipe boot flashings (per penetration) | $15 to $45 each | Must be metal-roofing-specific profile. Standard asphalt roof pipe boots do not work. |
| Closure strips (inside and outside) | $1.00 to $2.00 per linear ft | Must match your specific panel profile. Order with your panel material. |
| Butyl tape and urethane sealant | $50 to $150 per project | Used at all trim laps, penetration flashings, and end laps in panel runs. |
| Labor (contractor installation) | $2.50 to $5.00 per sq ft | San Antonio market rate for experienced metal roofing crew. Complex roofs are at the higher end. |
| Permit fee | $150 to $400 | Based on project value. Required for all permitted installations in San Antonio. |
- Existing layer count confirmed: one layer of shingles only
- Decking inspected and all soft or rotted sections replaced
- Structural capacity confirmed for the added weight of metal system and battens
- Permit obtained and posted at the job site
- Wind uplift requirements confirmed and matched to panel system
- All materials ordered and delivered, including profile-matched trim and closure strips
- Pressure-treated battens installed at correct spacing with chalk lines as guides
- Eave trim, rake trim, and valley flashing set before first panel installed
- First panel squared and confirmed before any fasteners driven
- Panel squareness checked every three to four panels against rake trim
- Fasteners driven through high ribs only, at correct torque with washers intact
- End laps in panel runs set to minimum 6 inches and sealed with butyl tape
- All penetration flashings installed with profile-specific pipe boots and closure strips
- Closure strips installed with sealant at ridge before ridge cap is placed
- All metal shavings swept from roof surface before crew departs
- Panel alignment confirmed from ground level on all sides
- All trim laps and joints confirmed sealed with no visible gaps
- Permit inspection completed and documentation filed
- Warranty documents received from manufacturer and contractor
- Next inspection date noted: inspect sealant at penetrations every three to five years
Is it OK to install metal roofing directly over asphalt shingles?
Do I need to remove the old shingles before installing metal roofing?
How much does it cost to install metal roofing over shingles in San Antonio?
Do I need furring strips or battens when installing metal over shingles?
What is the best type of metal roofing to install over shingles?
Will installing metal roofing over my shingles void my homeowners insurance?
Get a free metal roofing estimate in San Antonio
Not sure if your roof qualifies for a metal overlay or want a professional opinion before you order materials? We inspect for free, walk you through your options, and give you a written estimate with no obligation.
[/et_pb_code][/et_pb_column][/et_pb_row][/et_pb_section]