
[et_pb_section fb_built=”1″ admin_label=”section” _builder_version=”4.16″ global_colors_info=”{}”][et_pb_row admin_label=”row” _builder_version=”4.16″ background_size=”initial” background_position=”top_left” background_repeat=”repeat” global_colors_info=”{}”][et_pb_column type=”4_4″ _builder_version=”4.16″ custom_padding=”|||” global_colors_info=”{}” custom_padding__hover=”|||”][et_pb_code _builder_version=”4.27.6″ _module_preset=”default” global_colors_info=”{}”]
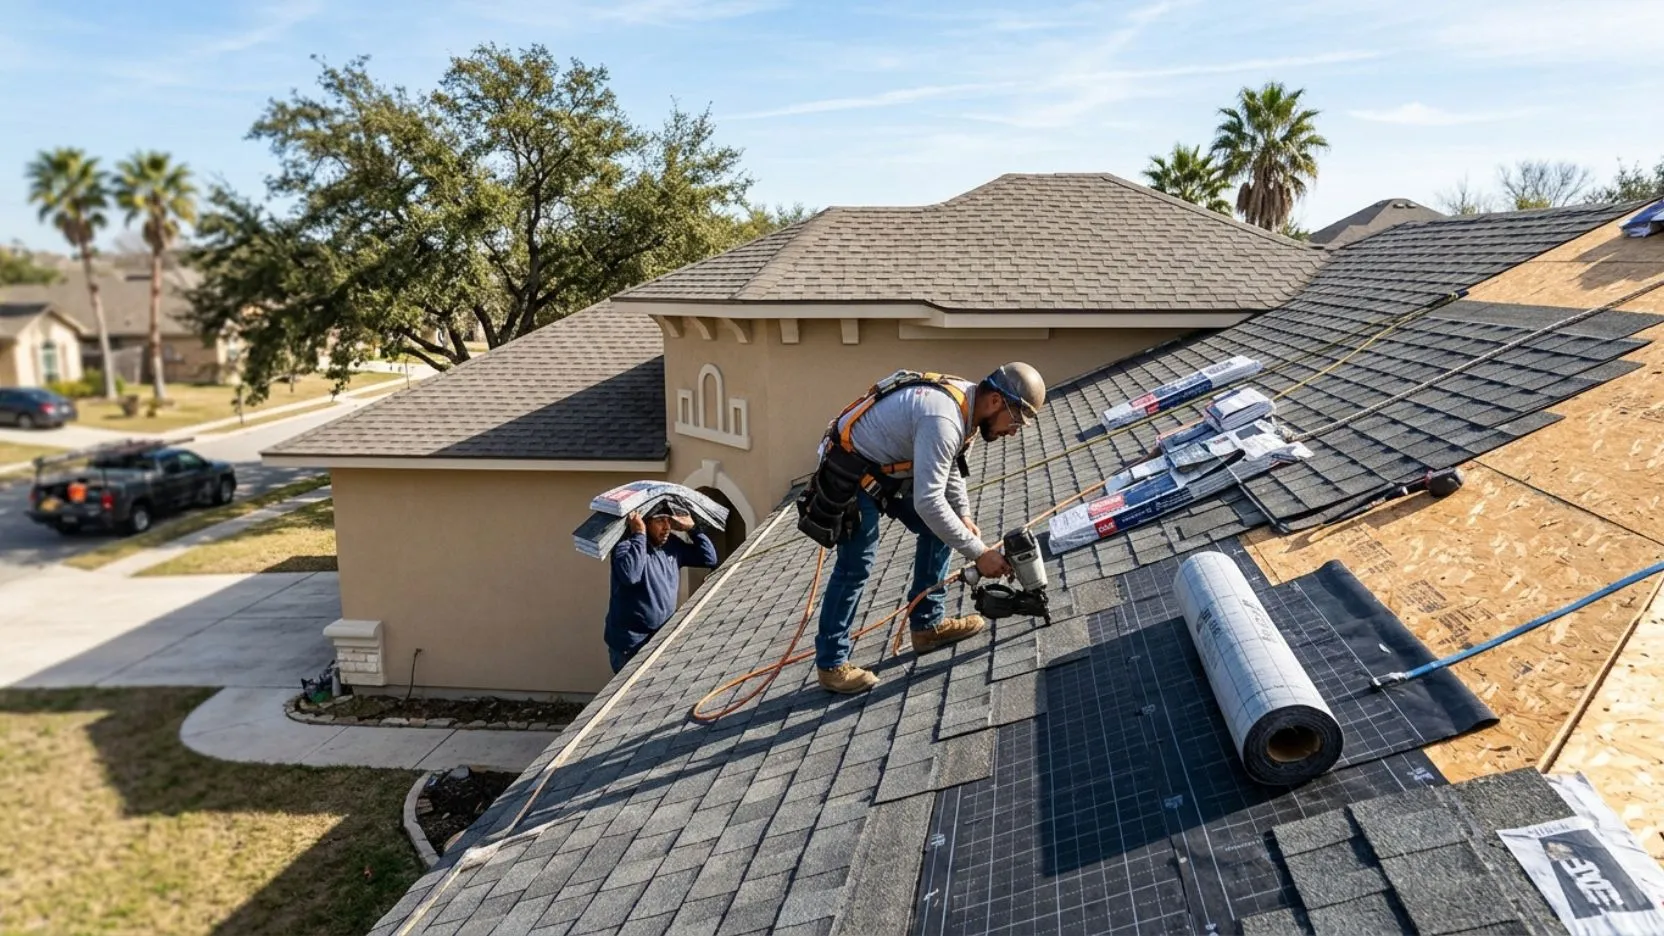
Installing or replacing a roof in San Antonio is a structured process, not a guessing game. This guide walks through every stage of a professional roof installation, from the first inspection to the final cleanup, what each step protects you from, and how the Texas heat, hail, and humidity shape the way a roof should be built here.
A roof installation is only as good as the process behind it. Two crews can install the same brand of shingles on the same house and end up with two very different roofs, because the difference is rarely the material on top. It is the preparation underneath: the condition of the decking, the quality of the underlayment, how the flashing is sealed, and whether the attic can breathe. In San Antonio, where roofs face triple-digit summer heat, sudden hailstorms, and high UV exposure all year, those hidden steps are what decide whether a roof lasts 12 years or 30.
This guide breaks the roof installation process in San Antonio into eight clear stages. You will see what happens at each step, why it matters in the Texas climate, what a quality contractor should be doing, and roughly how long the whole job takes. Whether you are replacing a worn-out roof or planning a build, understanding the process is the best way to recognize quality work and avoid a shortcut job.
The single biggest mistake San Antonio homeowners make is shopping for a roof by the color and brand of the top layer alone. A roof is a layered system. Solid decking, a quality synthetic underlayment, properly sealed flashing at every penetration, and adequate attic ventilation do more for the lifespan of your roof in this climate than the shingle name on the package. When you compare installation quotes, compare what each contractor is doing under the surface, not just the warranty on the top layer.
Step 1
A proper installation starts with a contractor on the roof, not a number over the phone. During the inspection, the contractor measures the roof, evaluates the pitch and access, checks the current roof covering and decking condition, looks at flashing, vents, and the state of the attic ventilation, and notes any soft spots or signs of past leaks. In San Antonio, the inspection should also account for the home orientation and sun exposure, since that drives ventilation and material decisions.
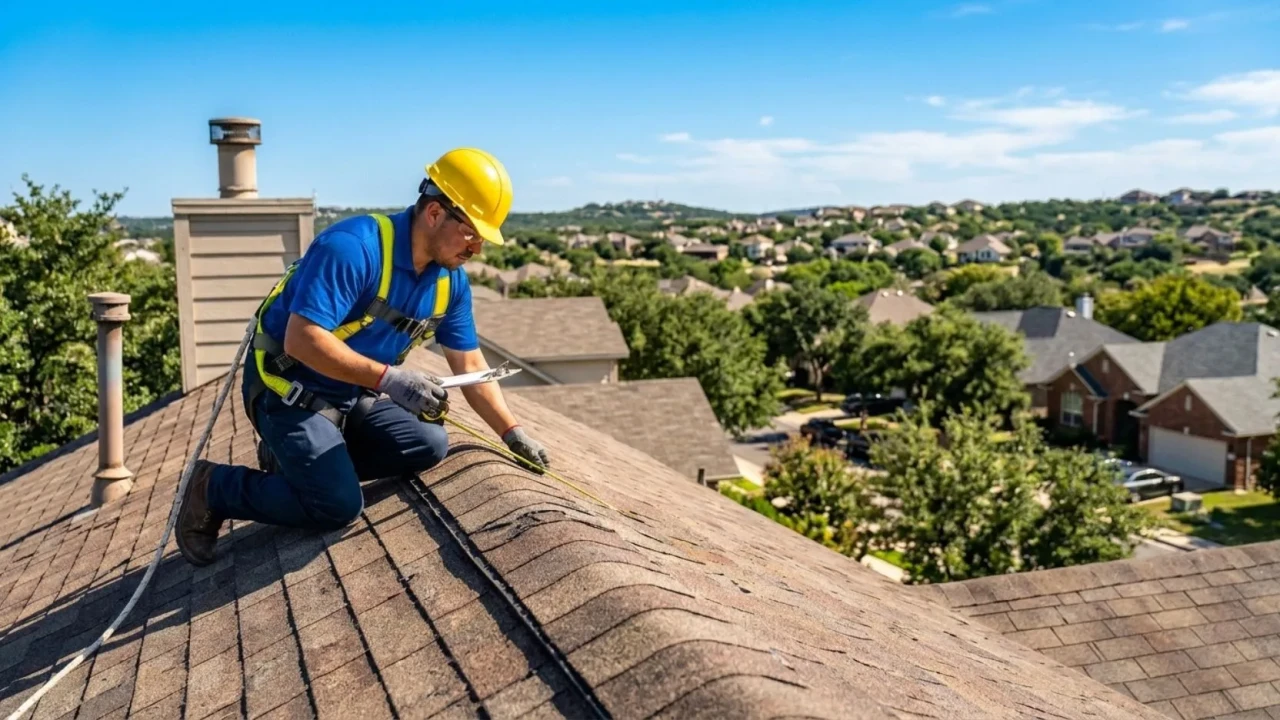
What a thorough inspection covers: roof measurements and pitch, decking condition, existing layers, flashing and penetrations, attic ventilation, and any underlying damage that needs repair before new material goes down.
What you should receive: a written, itemized estimate that lists the material, the underlayment, the flashing scope, the ventilation plan, the tear-off scope, and the cleanup, not just a single lump-sum price.
- Contractor physically inspected the roof and attic, not just the ground or ceiling
- Written estimate is itemized: material, underlayment, flashing, ventilation, tear-off, cleanup
- Per-sheet decking replacement price stated upfront in case of hidden rot
- Certificate of insurance and Texas roofing references provided before contract signing
- Estimate notes the manufacturer warranty and the separate workmanship warranty
Step 2
Once you approve the estimate, the next stage is locking in the material and pulling the permit. Material choice in San Antonio is driven by three local factors: extreme summer heat, the active hail corridor, and long UV exposure. Architectural asphalt shingles remain the most common and affordable choice, while metal roofing is increasingly popular here for its heat reflectivity and storm resistance. Clay and concrete tile suit certain home styles, and low-slope sections often call for a membrane system.
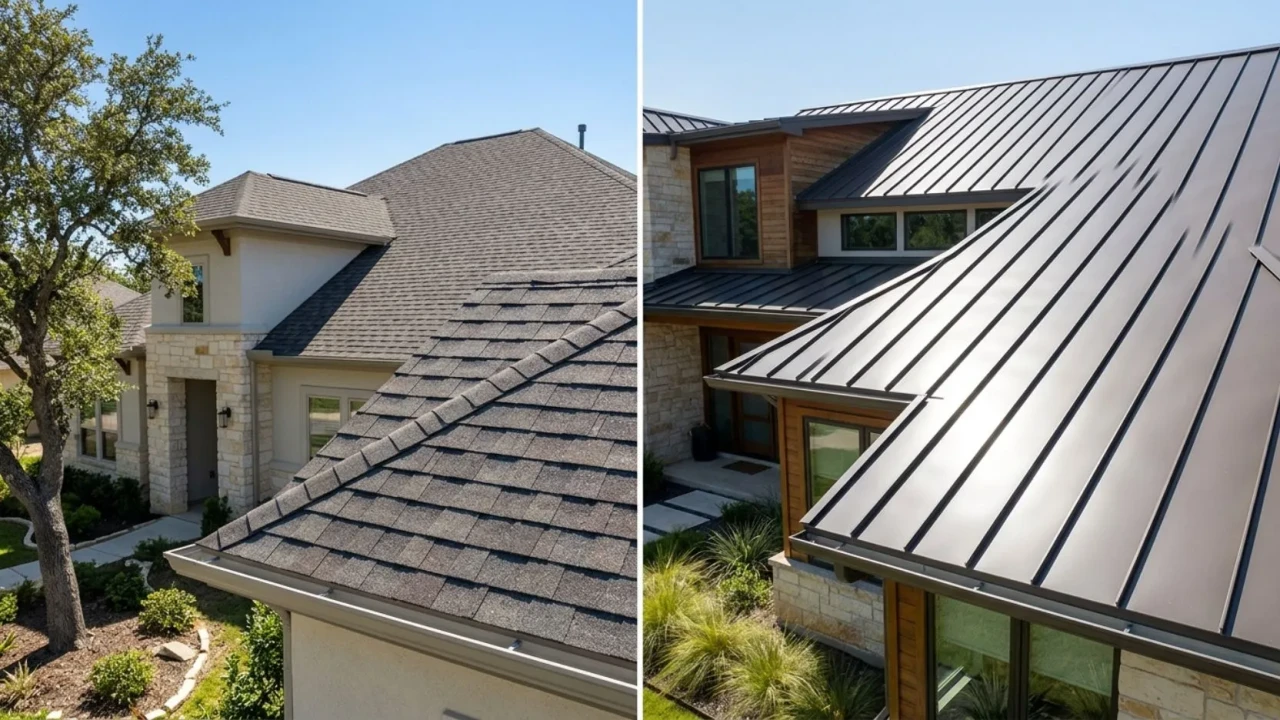
Common San Antonio roofing materials: architectural asphalt shingle, standing seam metal, exposed-fastener metal panel, clay or concrete tile, and membrane systems such as TPO for flat or low-slope sections.
The permit step: most full roof replacements in San Antonio require a permit from the City of San Antonio Development Services Department. A licensed, reputable contractor handles the permit for you and works to current code, which protects your warranty and your future home sale.
Ask about Class 4 impact-resistant shingles before you commit. In a hail-prone market like San Antonio, many Texas insurers offer a premium discount for Class 4 impact-rated roofing. The upfront cost is modest, the discount can add up year after year, and the roof itself holds up far better in a hailstorm. Confirm the exact rating in writing on your estimate and check with your insurer about the discount before installation day.
- Roofing material confirmed in writing, including brand, line, color, and impact rating
- Permit pulled by the contractor through City of San Antonio Development Services
- Class 4 impact-resistant option discussed for potential insurance savings
- Ventilation products specified to match the material and the attic design
- Material delivery scheduled so panels or shingles are on site before the crew arrives
Step 3
On installation day, the crew protects the property before anything comes off the roof. Tarps and plywood shield landscaping, the foundation, windows, the pool, and the air conditioner condenser from falling debris. Then the old roofing is torn off completely down to the wood decking. A full tear-off is the professional standard. Roofing over an existing layer hides decking problems, adds weight, traps heat, and voids many manufacturer warranties.
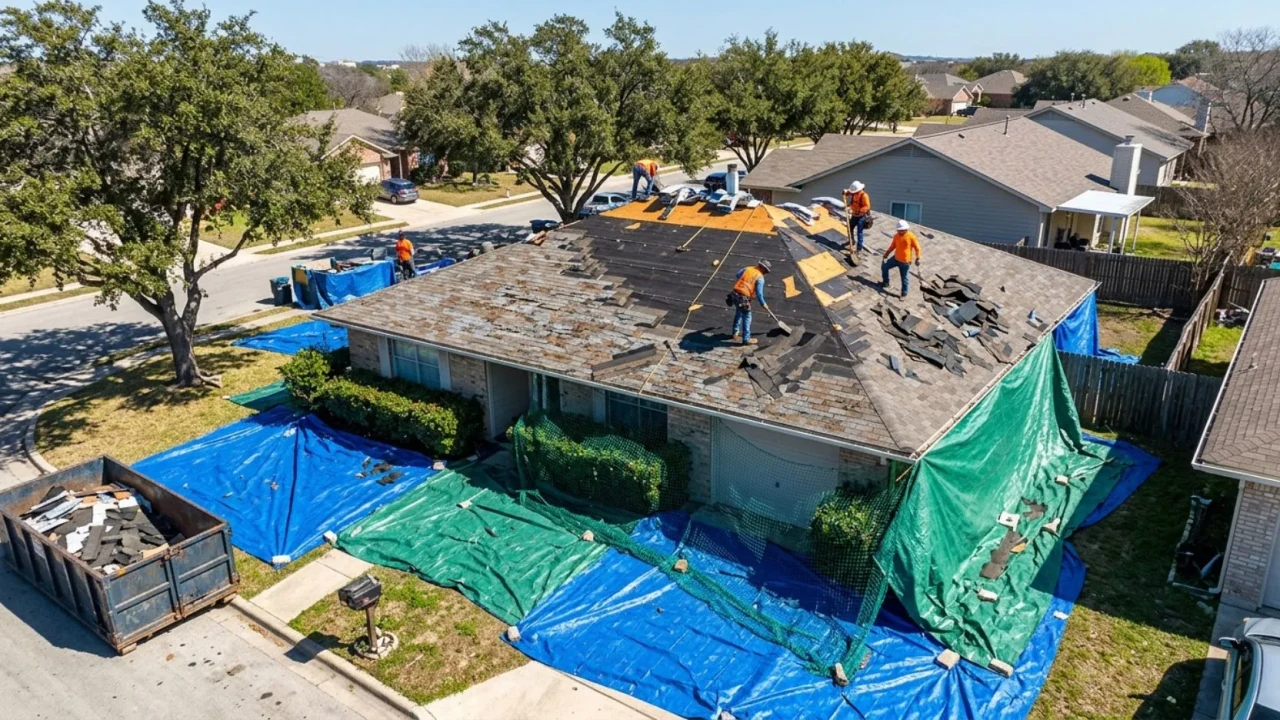
Why full tear-off matters: it exposes the decking so damage can be found and fixed, it removes the trapped heat layer that shortens roof life in San Antonio, and it satisfies the warranty requirements most shingle manufacturers set.
Property protection done right: ground tarps along the eaves, plywood leaned against walls and windows, the AC unit covered, and a magnetic nail sweep planned for the end of the job.
- Landscaping, foundation, windows, pool, and AC condenser protected before tear-off
- Existing roof removed completely down to the wood decking, no overlay
- Old material loaded into a dumpster or trailer, not left in piles around the yard
- Decking left clear and clean so the next inspection step can happen properly
- Magnetic nail sweep scheduled for the end of each work day and final cleanup
Step 4
With the old roof gone, the decking is exposed for the first time. This is the plywood or OSB sheathing the entire roof rests on, and it is the step where hidden problems show up. The crew walks the deck looking for soft spots, water staining, rot, delamination, and damaged sheets. Any compromised decking is replaced before the new roof goes down, because no underlayment or shingle can perform over a deck that is failing underneath it.
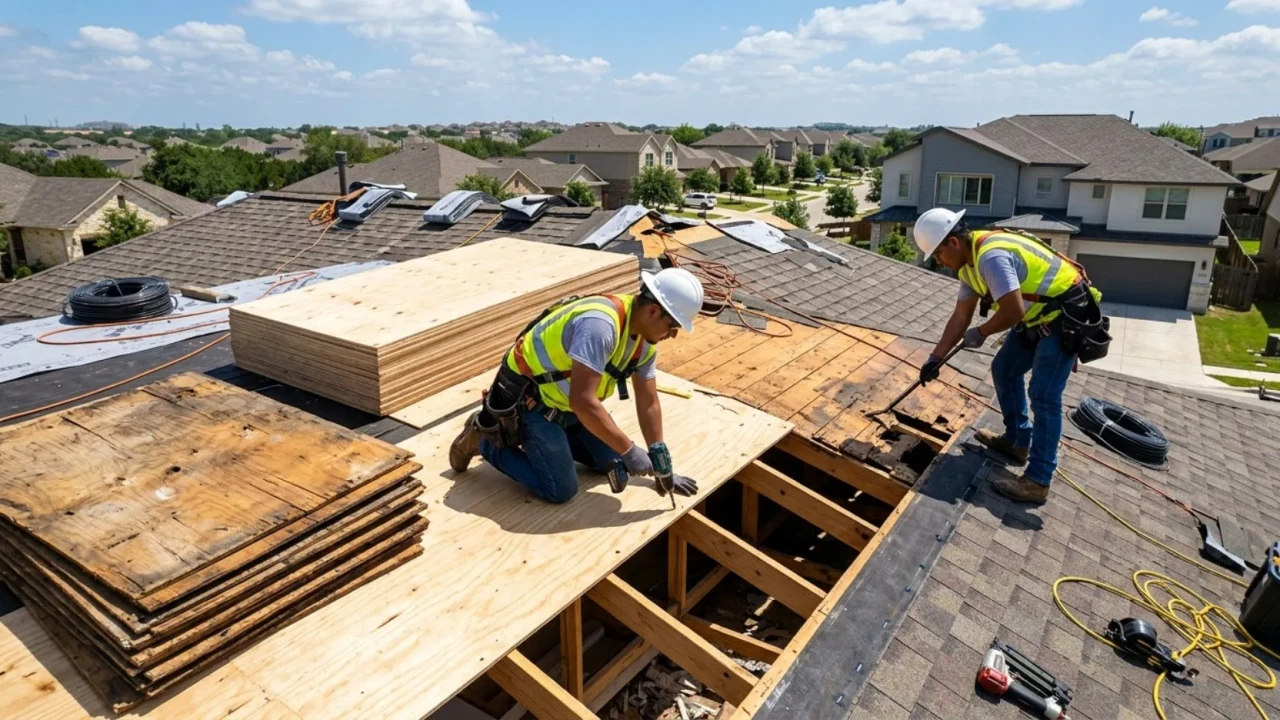
What the crew checks: soft or spongy areas underfoot, water stains or rot near valleys and penetrations, delaminated or warped sheets, and proper nailing of the existing deck to the rafters.
Why it cannot be skipped: a new roof installed over rotted decking will fail early at the weak points, and fasteners will not hold in compromised wood. Replacing bad sheets now is far cheaper than a callback later.
- Entire deck walked and inspected for rot, soft spots, and water damage after tear-off
- Damaged or delaminated sheets replaced with code-approved decking
- Loose decking re-nailed to the rafters for a solid fastening base
- Replacement billed at the per-sheet rate stated on the original estimate
- Deck surface cleaned of old nails and debris before underlayment goes down
Step 5
Underlayment is the layer most homeowners never see and the layer that quietly protects the home. It goes directly over the clean decking and acts as a secondary water barrier if wind-driven rain ever gets past the surface material. In San Antonio, a synthetic underlayment is the modern standard. It resists tearing, holds up to the heat far better than old felt paper, and stays stable on a deck that can reach scorching temperatures in summer.
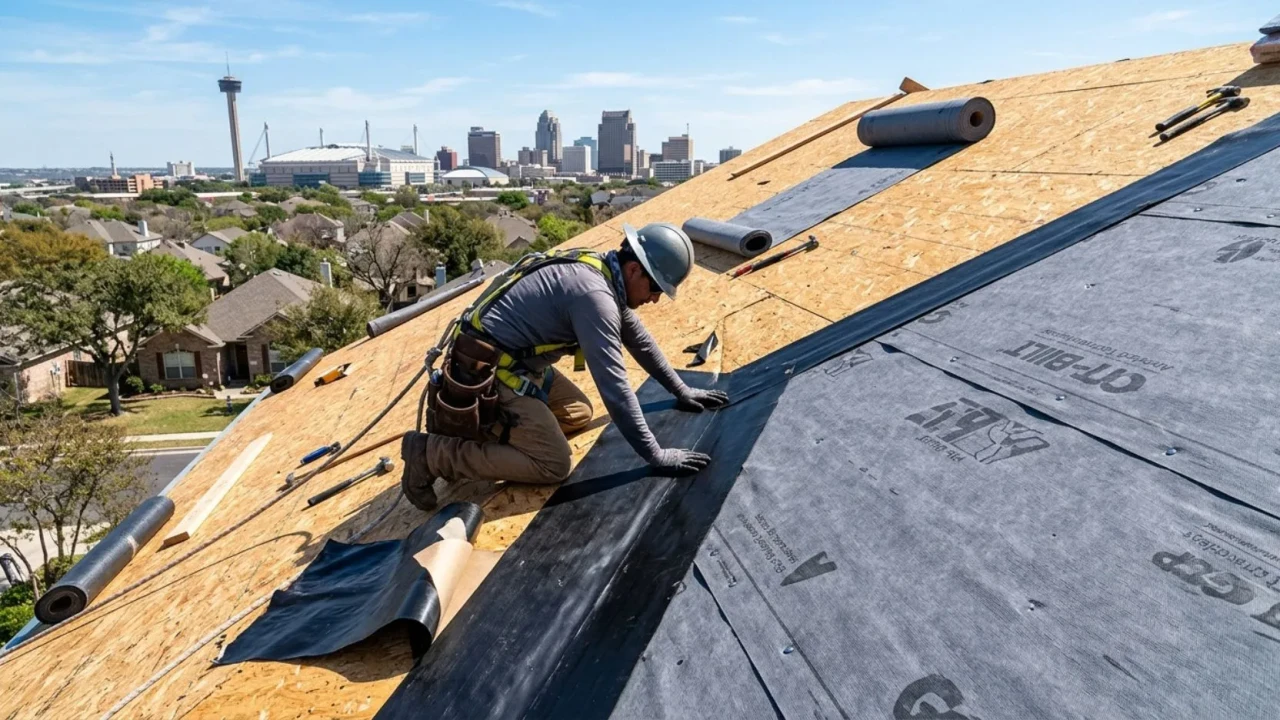
Synthetic underlayment: applied across the full deck as the primary moisture barrier, lighter and tougher than traditional felt and far more stable in the Texas heat.
Peel-and-stick membrane: a self-adhering waterproof membrane installed in valleys, around penetrations, and along eaves where wind-driven rain and water flow concentrate during San Antonio storms.
- Synthetic underlayment applied across the full roof deck, not thin felt paper
- Peel-and-stick waterproof membrane installed in all valleys and around penetrations
- Metal drip edge installed along eaves and rakes for clean water runoff
- Underlayment overlapped and fastened to manufacturer specification
- Eave and valley protection confirmed before any surface material is installed
Step 6
Almost every roof leak in San Antonio starts at a transition or a penetration, not in the middle of an open field of shingles. Flashing is the metal that seals these vulnerable points: chimneys, skylights, walls, valleys, plumbing vents, and HVAC curbs. On a quality installation, new flashing is installed at every penetration rather than reusing old, corroded metal. Reused flashing is one of the most common reasons a brand-new roof starts leaking within the first year.
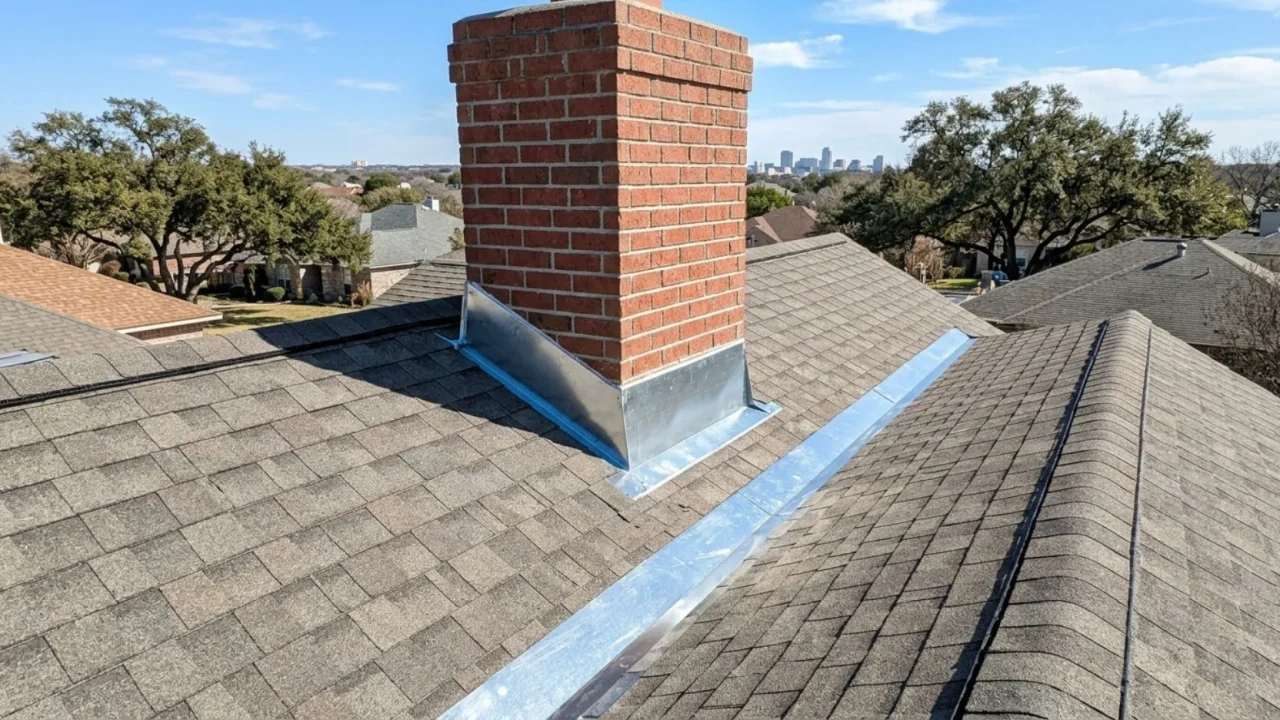
Where flashing goes: roof-to-wall transitions, chimneys, skylights, valleys, plumbing vent boots, and around any roof-mounted equipment. Each one is a planned, sealed detail, not an afterthought.
Why new beats reused: old flashing carries existing corrosion, bent edges, and worn sealant. Installing new flashing as part of the job is what keeps a new roof watertight at its weakest points.
Watch how the crew handles the plumbing vent boots. The rubber gasket on a plastic vent boot is one of the first things to fail under San Antonio UV exposure, often cracking within a few years. A quality installation uses new boots with a longer-lasting collar, and a careful crew will note the boot type on your estimate. It is a small line item that prevents a surprisingly common leak a few summers down the road.
- New flashing installed at every wall, chimney, skylight, and valley, not reused
- New plumbing vent boots installed with UV-resistant collars
- Step flashing used at roof-to-wall transitions and woven into the courses
- Valleys detailed to direct water flow and sealed over peel-and-stick membrane
- Chimney counter-flashing set into the masonry, not just surface-caulked
Step 7
With the waterproofing and flashing in place, the surface material is installed. Shingles are laid in courses from the eaves up, nailed to the manufacturer pattern, with the correct number of fasteners per shingle for the Texas wind zone. Metal panels are fastened and seamed according to the profile. This stage is also where attic ventilation is completed, and in San Antonio that is not a minor detail. A hot attic with poor airflow cooks the roof from below, drives up cooling bills, and shortens the life of the entire system.
Balanced ventilation means intake at the eaves or soffits and exhaust at the ridge, so hot air moves out and is replaced by cooler air. Ridge vents are the most common modern solution, often paired with proper soffit intake. Getting this balance right is one of the clearest signs of a contractor who builds for the local climate rather than just covering the roof.
- Surface material installed to manufacturer specification with correct fastener count
- Starter strips at the eaves and proper ridge cap or seam detailing at the peak
- Balanced ventilation installed: intake at soffits, exhaust at the ridge
- Existing or new soffit intake confirmed so exhaust vents are not starved
- Fastening pattern matched to the local wind zone for storm resistance
Step 8
A professional job is not finished when the last shingle is nailed. The crew performs a full cleanup: debris is removed, gutters are cleared of granules and nails, and the entire property is swept with rolling magnets to catch stray fasteners that could end up in a tire or a bare foot. Then a final inspection confirms the work, often followed by a city inspection on permitted jobs to verify the installation meets code.
The final handoff should include your paperwork: the manufacturer material warranty, the contractor workmanship warranty, the permit documentation, and photos of the completed roof. Final payment comes after the work is inspected and you are satisfied, not before. This is the stage that turns a finished roof into a documented, warrantied, code-compliant installation you can stand behind at resale.
On a permitted roof installation in San Antonio, the job is not truly complete until the final inspection passes and you have received the material warranty, the workmanship warranty, and the permit closeout. A reputable contractor expects this and will not ask for the full balance before the work is verified. Keep all documentation on file. It matters for future claims and adds real value when you sell the home.
- Full debris cleanup with gutters cleared of granules and fasteners
- Property swept with rolling magnets, more than once, to catch stray nails
- Final contractor inspection and any required city inspection completed and passed
- Manufacturer warranty, workmanship warranty, and permit closeout delivered to you
- Final payment made only after the work is inspected and you are satisfied
Most residential roof installations in San Antonio are completed in one to three working days, weather permitting. Larger homes, steep or complex roofs, tile, and certain metal systems take longer. Here is how a standard residential replacement usually flows once the crew arrives on site.
These ranges reflect typical installed San Antonio market rates in 2026 and include tear-off, underlayment, flashing, and standard ventilation. Actual cost depends on roof size, pitch, access, decking condition, and the specific product line. Always confirm the full scope and price in writing before work begins. As a rough planning figure, a common San Antonio single-story home has roughly 1,800 to 2,200 square feet of roof area.
| Material | Typical installed cost (per sq ft) | Best for | Expected lifespan |
|---|---|---|---|
| 3-tab asphalt shingle | $3.50 to $5.50 | Budget replacements and rental properties | 15 to 20 years |
| Architectural asphalt shingle | $4.50 to $8.00 | The most popular all-round choice in San Antonio | 25 to 30 years |
| Impact-resistant (Class 4) shingle | $6.00 to $9.50 | Hail protection and possible insurance discounts | 25 to 30 years |
| Exposed-fastener metal panel | $7.00 to $12.00 | Affordable metal, barns, and modern homes | 30 to 45 years |
| Standing seam metal | $10.00 to $16.00 | Premium heat reflectivity and storm resistance | 40 to 70 years |
| Clay or concrete tile | $10.00 to $20.00 | Spanish and Mediterranean home styles | 50+ years |
| Membrane (TPO) for low-slope | $5.00 to $9.00 | Flat and low-slope roof sections | 20 to 30 years |
- Contractor inspected the roof and attic in person before quoting
- Written, itemized estimate received with material, underlayment, flashing, ventilation, and cleanup spelled out
- Per-sheet decking replacement price stated upfront in case of hidden rot
- City of San Antonio permit confirmed as the contractor responsibility
- Certificate of insurance verified with at least $1 million general liability coverage
- Material, color, and impact rating confirmed in writing
- Landscaping, foundation, windows, pool, and AC condenser protected before tear-off
- Full tear-off down to the decking, with no roofing over the old layer
- Damaged decking replaced and loose decking re-nailed to the rafters
- Synthetic underlayment installed with peel-and-stick membrane in valleys and penetrations
- New flashing and new vent boots installed at every penetration, not reused
- Balanced ventilation installed with intake at soffits and exhaust at the ridge
- Full debris cleanup with gutters cleared and the property swept with rolling magnets
- Final contractor inspection and any required city inspection passed
- Manufacturer warranty, workmanship warranty, and permit closeout received in writing
- Photos of the completed roof kept on file for future claims and resale
- Final payment made only after the work is inspected and you are satisfied
- Next maintenance inspection noted, ideally after the first storm season
How long does a roof installation take in San Antonio?
Do I need a permit to install a new roof in San Antonio?
Can a new roof be installed over the old one?
What is the best roofing material for the San Antonio climate?
How much does it cost to install a roof in San Antonio?
What should I look for in a roof installation estimate?
Get a free roof installation estimate in San Antonio
Planning a replacement or a new roof? Tell us about your home and we will inspect the roof for free, review your material options, and give you a clear, itemized written estimate at no cost.
[/et_pb_code][/et_pb_column][/et_pb_row][/et_pb_section]